If you’re reading this blog post, you probably already have an idea about Microsoft Planner and may even use it regularly as a task management tool. Therefore, we won’t go through the basic capabilities of the app. We discussed it in detail along with Planner integration with Teams in this article. Today, we will share with you some tips practice ourselves that can help you use Planner more efficiently.
- 1. Create Microsoft Planner task templates to copy tasks
- 2. Add Microsoft Planner to your Outlook calendar
- 3. Make use of buckets
- 4. Use attachments
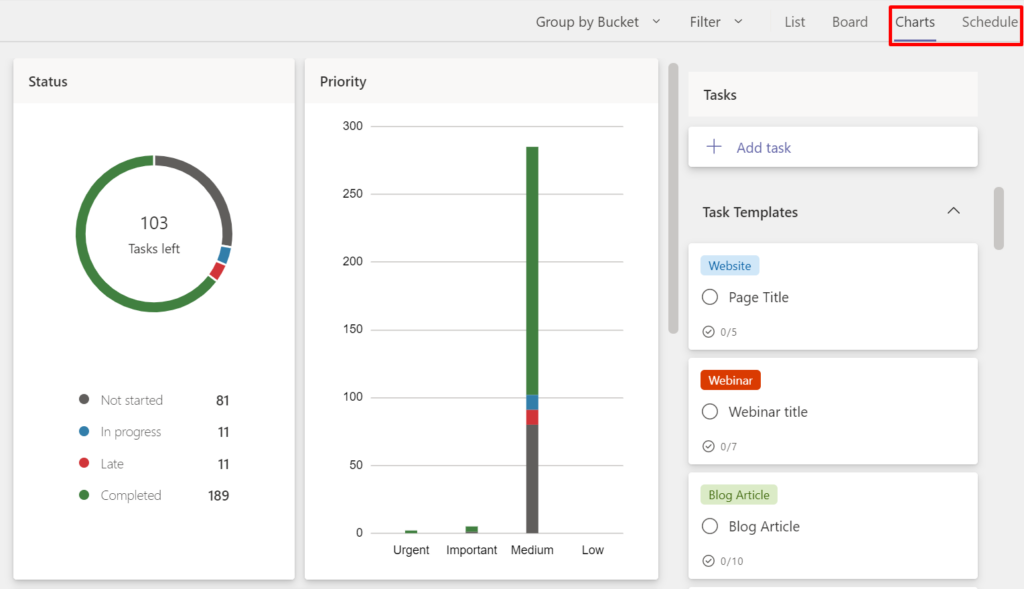
- 5. Explore Chart and Schedule views in Microsoft Planner to track progress
- 6. Add Planner as a tab in your team
- 7. Microsoft Planner and Power Automate
- 8. Create Microsoft Planner templates for your teams
- Final thoughts on how to use Microsoft Planner
1. Create Microsoft Planner task templates to copy tasks
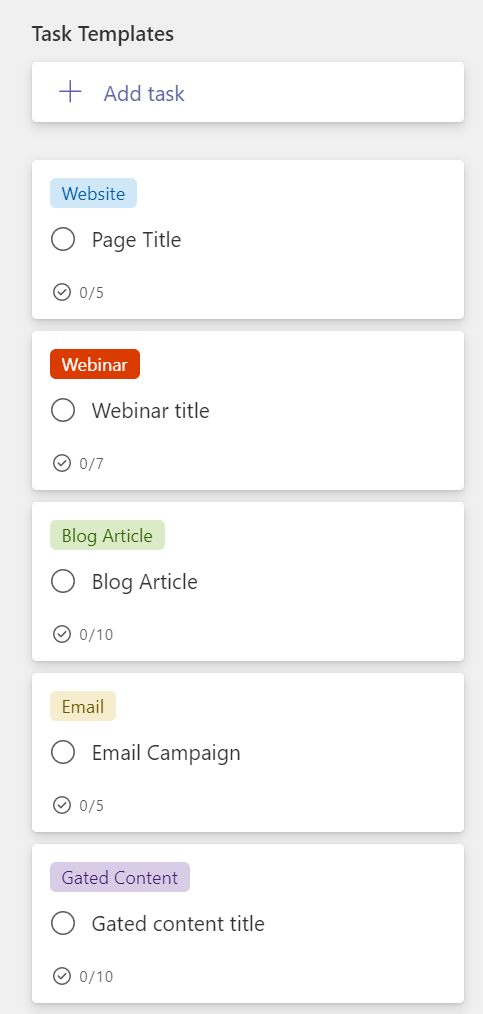
If the tasks you work on have a repetitive format, you may want to create task templates to save time on organizing your tasks.
Let’s take an example we use here at nBold. We use Planner to organize our marketing activities be that content creation, social media, webinars, email campaigns, etc. We created a structure with a checklist that we follow for each task.
Then, we add a label to those tasks to easily understand which template to use. For example, we have such labels as Blog article, Website page, White paper, Webinar, Social media, etc.
We actively use buckets to structure our planning, and the very first bucket is dedicated to these ‘task templates’. Whenever you need to plan a new blog article, just choose the right task template and then copy it, name it accordingly, and move to the right bucket.
This will save you quite a bit of time on creating tasks from scratch and help your team to complete their assignments faster.
2. Add Microsoft Planner to your Outlook calendar
Sometimes we have too many things on our plate so it can be tricky to remember every single thing we need to do. To make sure you always stay up to date about what’s coming up, you can connect Microsoft Planner to your Outlook calendar. In this way, you will receive notifications about all your upcoming tasks.
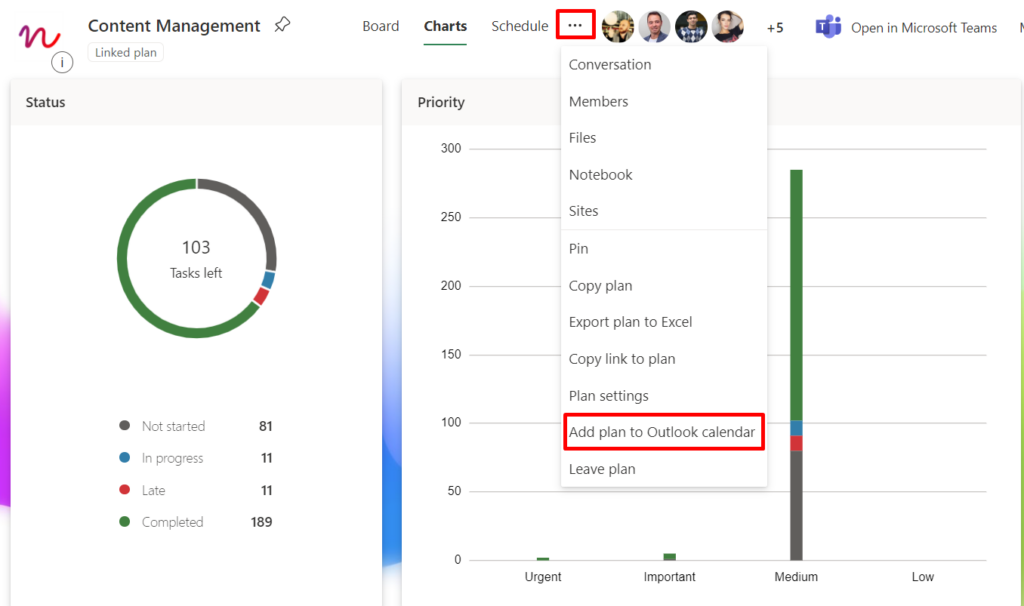
To sync it with your calendar, click on More options […] > Add plan to Outlook calendar on your navigation bar.
Make sure to register due dates for the tasks and assign them to the right team members so that they receive notifications.
Microsoft Teams & Planner: Best practices
Learn how to make the most of Teams & Planner integration and build teams with pre-built Planner task boards
3. Make use of buckets
While describing our first tip, we mentioned that we use buckets to structure all our tasks. While the very first bucket can be dedicated to your task templates, you can use others to help you organize your planning. There are various ways to do that, and they depend on the type of activities you’re doing.
In our case, for content marketing activities we created buckets that represent stages of content creation: content ideas, outlines, outlines in review, draft in progress, draft in review, finalized, scheduled, published.
If your tasks also involve various stages of implementation, it may be a good idea to organize them in this manner.
You may also want to categorize your tasks according to the level of priority, per difficulty, per type of task, per team member, or even per client or contractor. It really depends on the field you’re working in and your specific needs.
4. Use attachments
Having an attachment to a task can make a big difference in terms of efficiency and velocity of execution. Whether you’re adding a task for your team or for yourself, attach a link or file right to it if there’s any to add. For example, if you’re creating a task for writing a blog post, you can attach a document where you’d add outlines and links to resources.
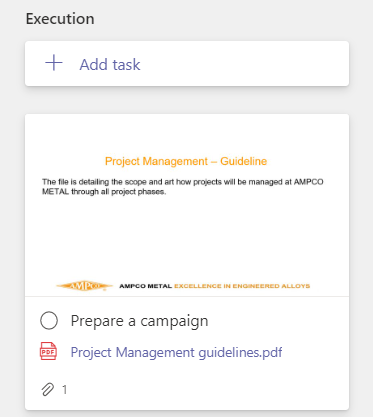
In this way, when you start working on the article draft, you don’t have to look for it throughout all your files – it’s right there ready in place. The great thing about using attachments in Planner task is that it creates an image preview on the task board. It helps you find the right task much faster, and you can see which tasks are already in progress.
5. Explore Chart and Schedule views in Microsoft Planner to track progress
You can view your tasks in different ways to have a clearer idea on what’s on your agenda.
While Board view is convenient to organize all your tasks, you may want to also explore Chart and Schedule views.
Chart view visually presents to you the status of you all your tasks (not started, in progress, late, and completed) so you can easily see if your team is on track with all their tasks. You can also see your tasks according to the level of priority, buckets, and members.
Use Schedule view to have a clearer picture on what tasks you need to complete in the following weeks and months.
→Download White Paper: Microsoft Teams & Planner Best Practices
6. Add Planner as a tab in your team
If along with Planner you and your team are actively using Microsoft Teams, you may want to connect the two to increase your productivity.
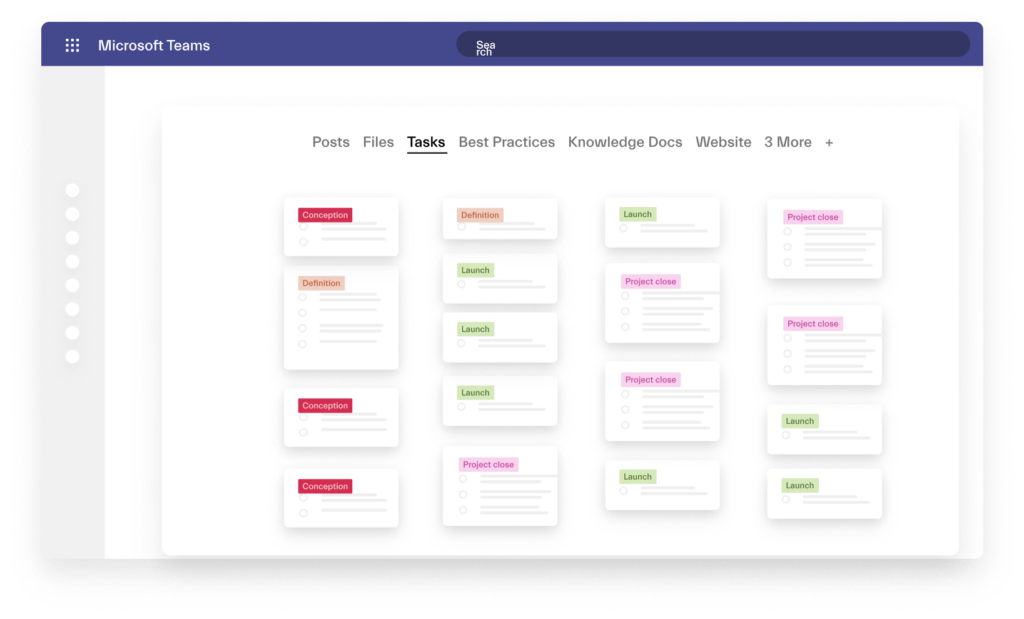
To do that, choose the right team and the channel that corresponds to the plan you’re working on, and then add a new tab with that plan. Having Planner connected to Microsoft Teams allows team discussions around tasks, as well as access the plan easily.
You can learn more about Microsoft Teams and Planner integration here.
7. Microsoft Planner and Power Automate
If you’re working on multiple projects with Planner, and have quite a few plans to handle, managing task creation can become a daunting routine.
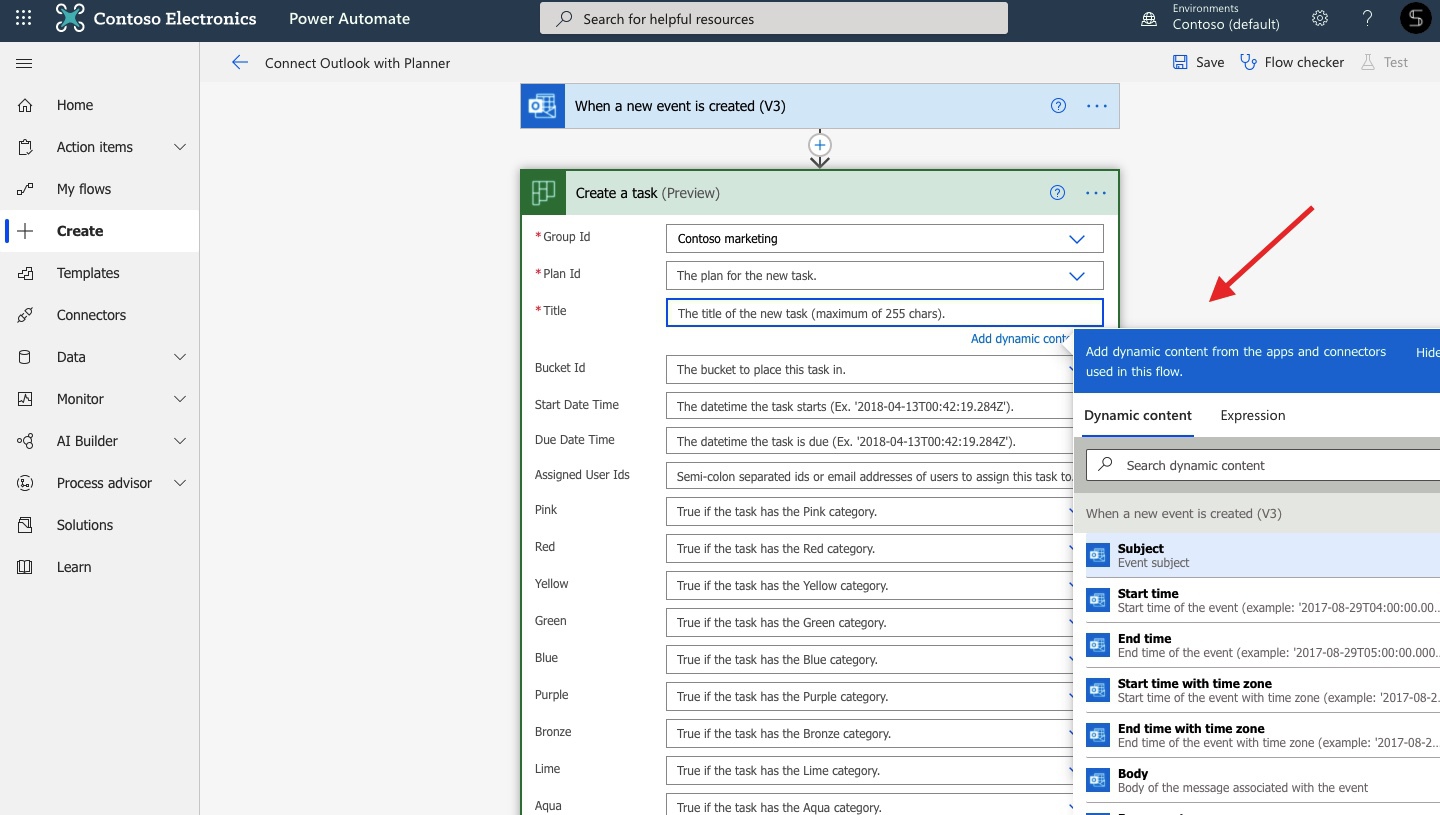
This is where Power Automate can make your life much easier. With its Planner connector you can perform all sorts of actions such as creating a task, adding assignees to a task, getting task details, listing buckets, etc.
Possibilities are endless. Head over to this blog post to explore 10 ready-to-use flows for Power Automate and Planner.
8. Create Microsoft Planner templates for your teams
Let’s say, you create a separate team for each new project, deal, account, or campaign. There are certain execution guidelines you and your team follow to work on those processes. You use Planner to organize all the tasks you need to complete. However, you need to build plans from scratch over and over again for each new team.
One of the most efficient ways to deal with that is by creating Planner templates for all your repetitive tasks. You can do that with Collaboration Templates by nBold. In addition to having fully customized task boards with all the checklists, attachments, and other elements, you also get a pre-defined team with all the right members already added to the team, channel structure, files and folders and your everyday tools.
In this way, you can start working on your new project straight away with everything you need ready in place.
Contact our team to learn how you can apply Collaboration Templates to your specific business needs.
Final thoughts on how to use Microsoft Planner
Overall, you can use Microsoft Planner to organize yours and your team’s tasks in a structured way. Create tasks categories using buckets, prepare tasks templates for repeatable jobs, connect Planner to Outlook to stay on top of your tasks, use attachments, track progress of each team member, add Planner to Teams for higher productivity, automate task creation using Power Automate and create Planner templates for your key processes.
