In today’s realities, the collaborative way of working provides many opportunities for development and successful work. One of the key elements of successful collaborative work is the ability to get quick feedback from colleagues or customers. This is the main idea behind the Microsoft Forms app. In this article, we’ll show you how to use Forms and how to integrate Microsoft Teams and Forms for successful collaboration.
What is Microsoft Forms?

Microsoft Forms is a web-based application that is a part of the Microsoft 365 environment. Microsoft Forms lets you create surveys, quizzes, and questionnaires with a very intuitive builder.
You can easily connect Forms and start collecting feedback and sharing results at the organizational level. It can be used in many types of businesses and industries to collect data and generate a real-time report.
First, let’s talk about the key benefits of the Microsoft Forms application.
Web-based application. This benefit allows you to easily create and share forms in your own intranet environment. During the creation of a new collaboration silo, you will see a unique URL address for easy sharing and integration.
Easy integration with Office 365 services. Just like other Microsoft products, Forms can be integrated into many different applications, such as Microsoft Teams, SharePoint, Microsoft Flow, and more. This allows you to collaborate effectively without juggling between software.
Forms sharing. After forms creation, you can quickly share it with any person in your organization just using a URL. Moreover, Microsoft Forms can be shared with external anonymous users to collect data.
Collecting results. You can add forms to your intranet, internal tools, and even your website: everything depends on your particular use case. Therefore, you will allow your co-workers or customers to fill in forms easily. After submitting the forms, you can collect results and generate a report using real-time analytics.
Forms templates. You can save time by copying forms from the existing one that you use as a template. You can even add forms to your Teams environment at the template level.
High level of security. Of course, as a Microsoft Product, Forms is a secured and safe application. It allows you to collect data in a secure way with Office 365 Compliance rules.
How to use Microsoft Forms?
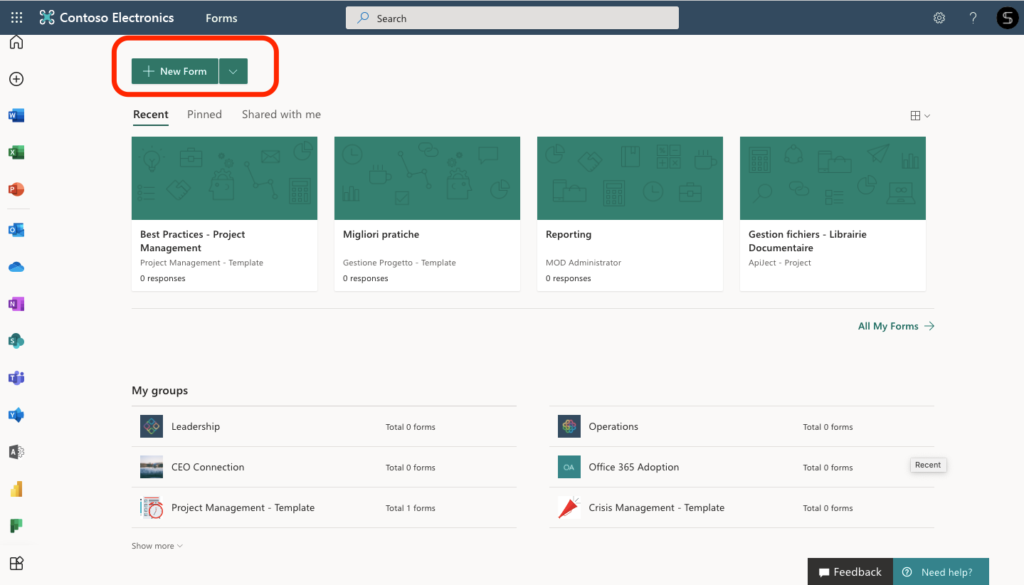
To start using Microsoft Forms, first sign into your Office 365 and you will see the Forms icon. By clicking on the Forms icon, you will see the home page. There you can find all your forms, as well as the forms that are shared with you. Now, let’s create a new form.
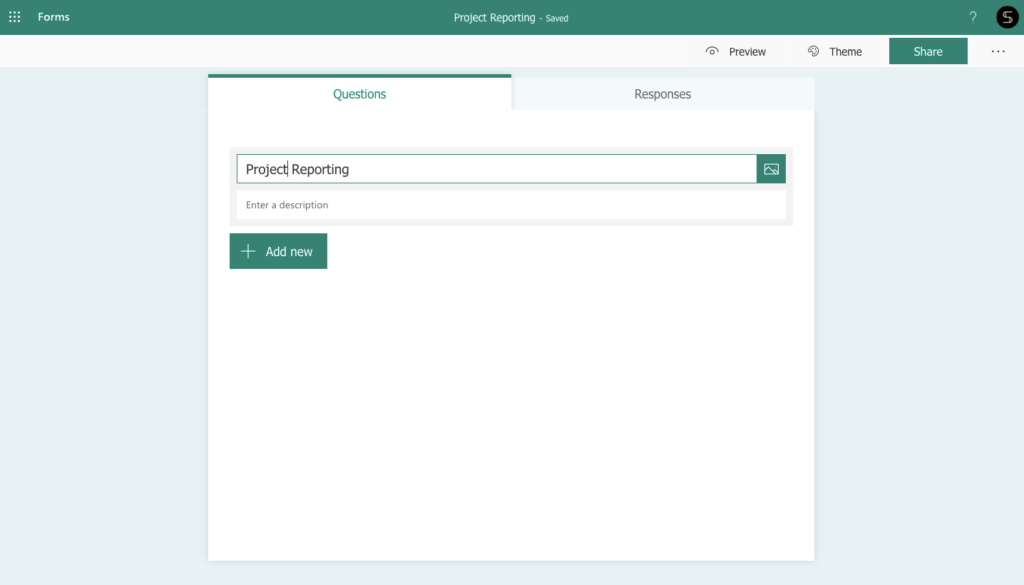
The first thing you want to do is to give your form a name. Then, you can enter your description. People will easily understand what this form is for. To personalize your form, you can even put a picture.
Forms content creation
Next, let’s start creating the content. You will see several options, such as choose, text, rating, date, and more. Microsoft even recommends some templates you might want to use, for example, what’s your name, preferences, etc.
When you click on choose, you get various options to pick from. You can have multiple choices, just start to enter the question and options depending on your use case. In addition, you can allow multiple answers, and add a requirement, thus people cannot skip this question.
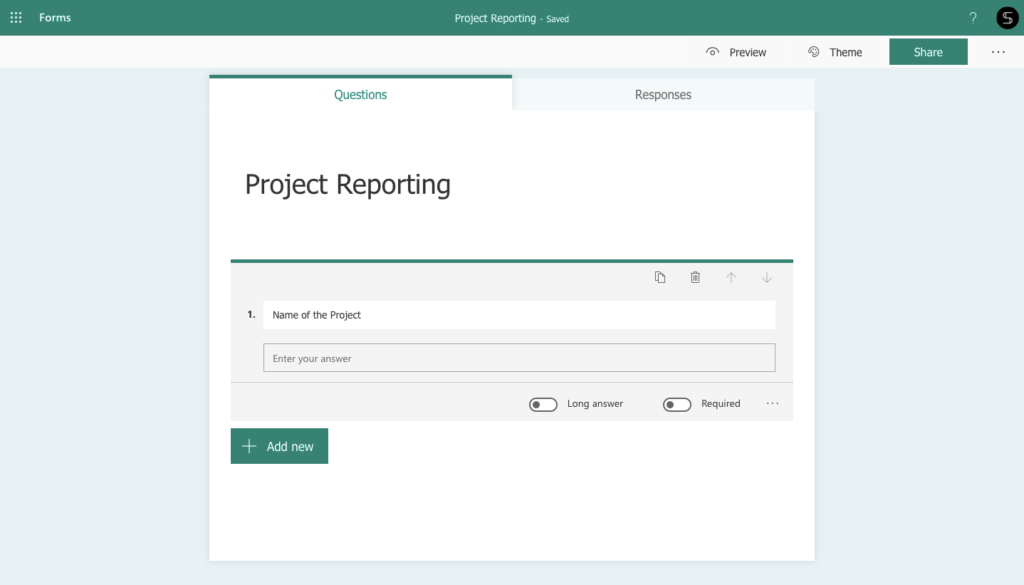
By clicking on Text, people will see the field where they should type their answers. It could be their name or the name of the customers or projects.
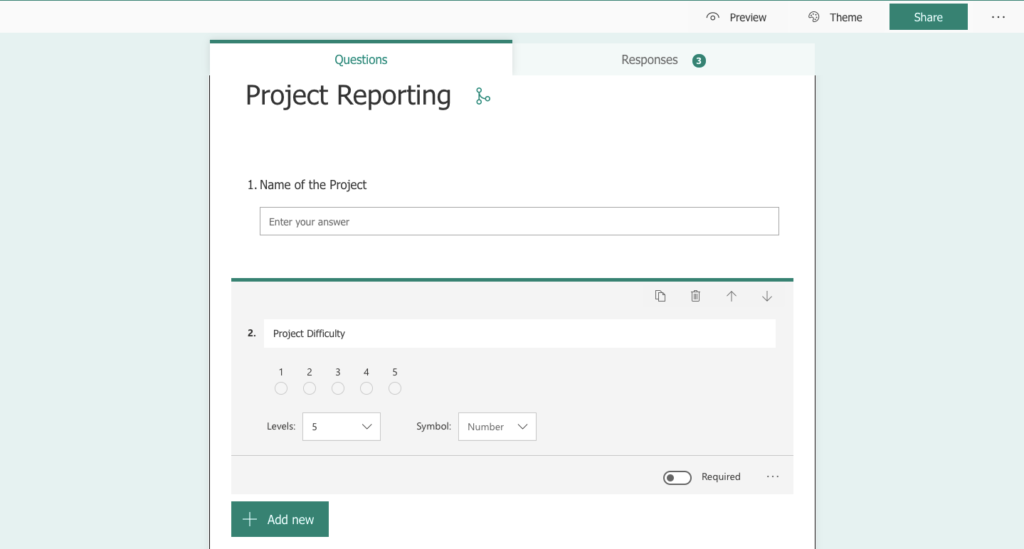
Moreover, people can give their opinion by choosing ratings. For example, you want to know your customers’ satisfaction or the quality of your customer service.
White Paper: Project Management with Microsoft Teams
Learn how to use Microsoft Teams for effective project management
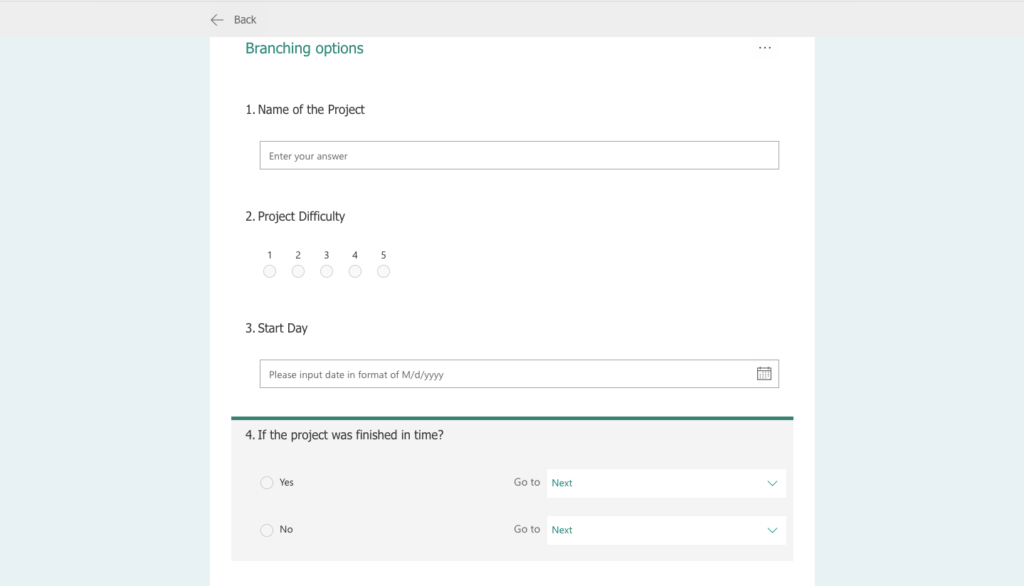
There is one more option called branching. For instance, if someone clicks “yes” in your third option, they will see the fourth option. When you click on branching, you can navigate to a section of the questions based on the answers. In other words, this option serves you as a navigation tool to move people from one section to another, depending on their answers.
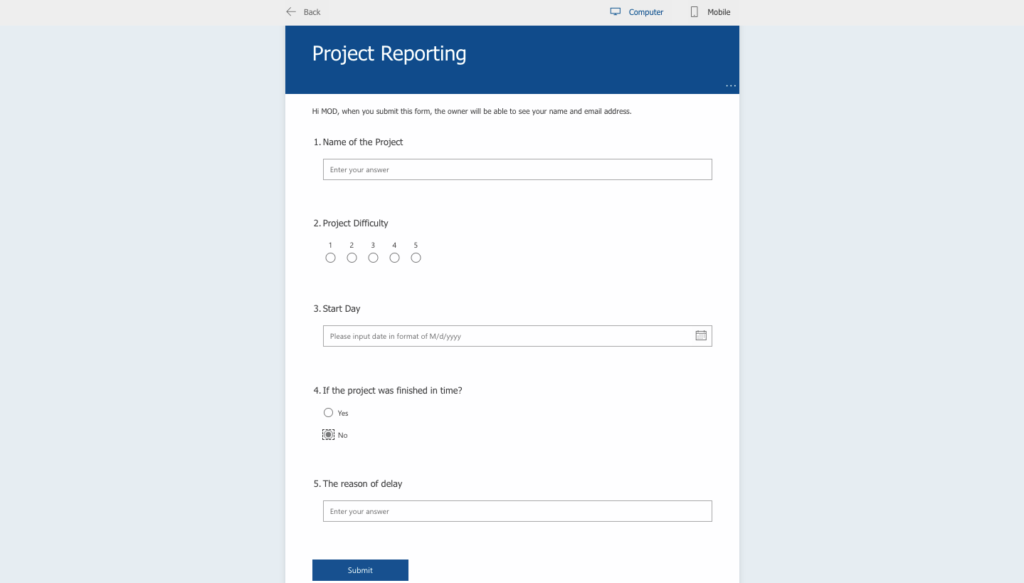
When the questionnaire is built out, you can click on the preview to check how it looks like.
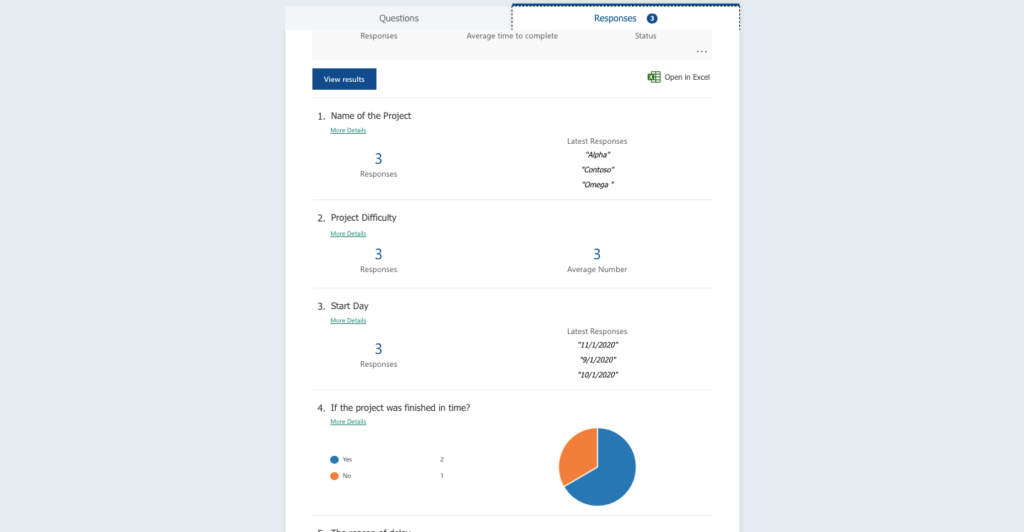
After publishing your form, you will start collecting responses. On this tab, you will see what people entered. You can click on many different details to see more information about each section in your form. There are also some visuals that allow you to quickly analyze responses. If needed, you can even click on view results and go through the results one by one.
Microsoft Forms sharing
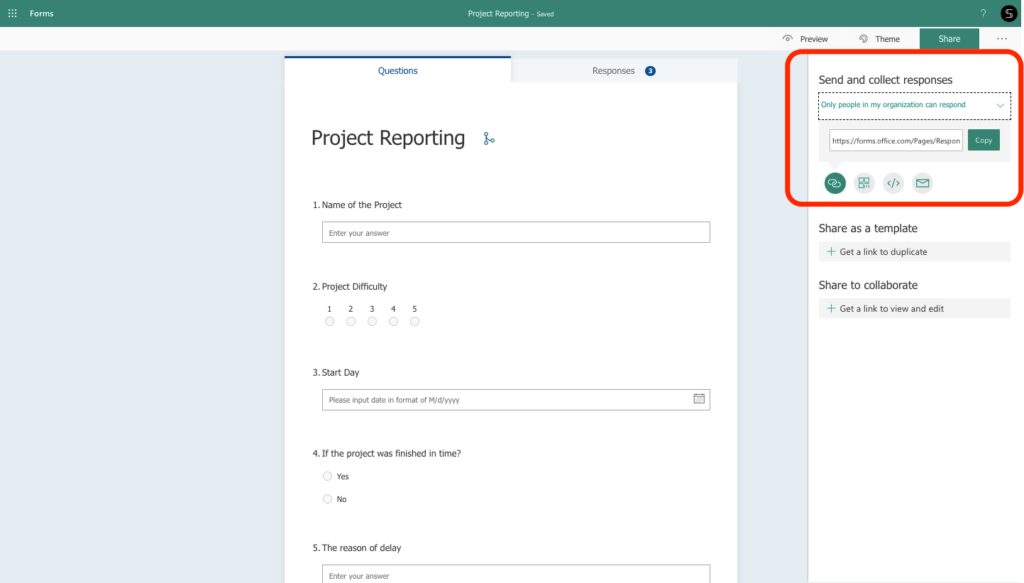
There are many options to share your forms across the organization or with any external users. When your form is ready, click on Share and you will see the link. The first option is just to copy this link and paste it into your email. Anybody who clicked on it will be taken to the form where they can submit their response.
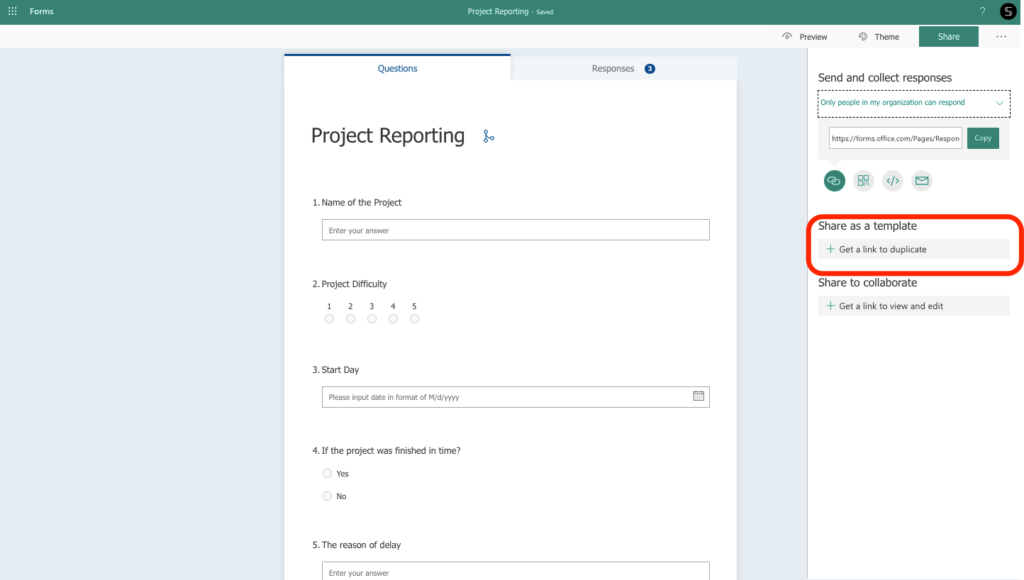
Next, you can share it as a template for your colleagues. Hence, they can use it to create similar forms in the future.
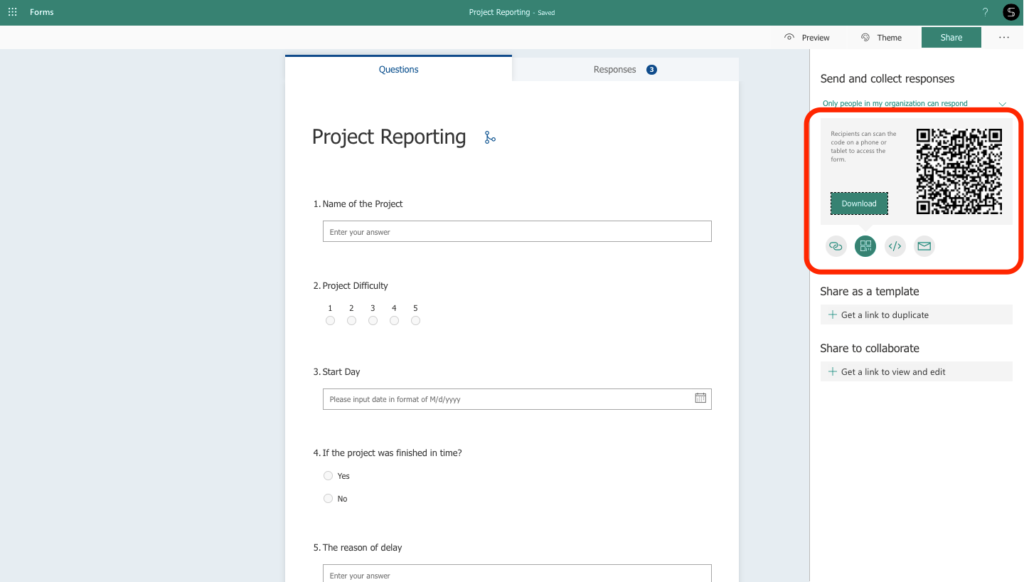
One more amazing option is to use a QR barcode. It’s very useful if you want a large audience to quickly connect to your Microsoft Form. You can even add this form to your web page by copying it with a short code.
What we like the most is the possibility to share your forms with other Microsoft products. So, let’s go through Forms integrations.
Forms integrations
SharePoint with Forms
As we mentioned before you can easily add your forms right to the web page. The same mechanism works with your SharePoint Intranet.
Let’s say you would like to create a new page in your SharePoint environment. Read our article about SharePoint and Microsoft Teams here.
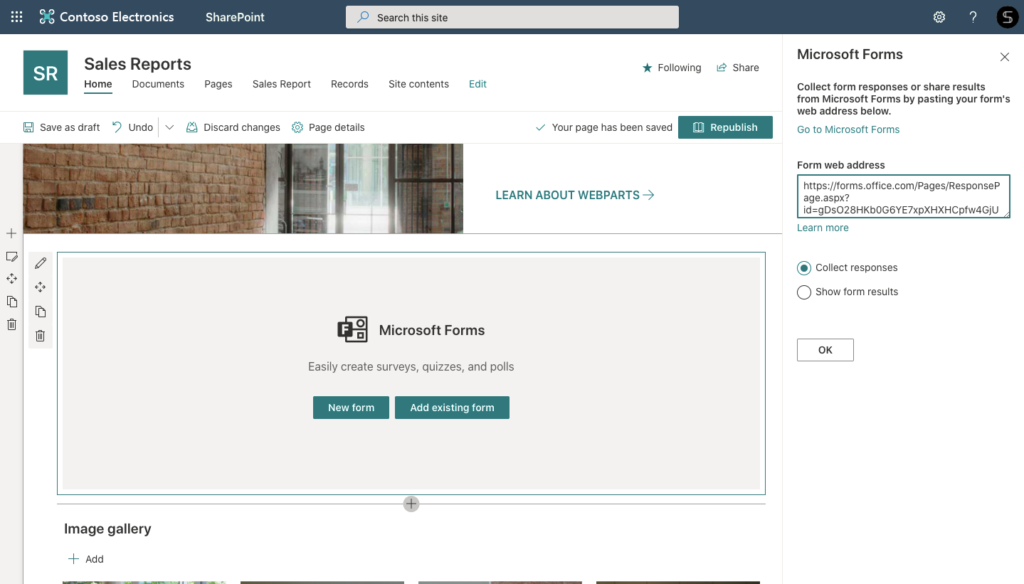
Right here you can add a new form and create it right from a SharePoint site. One more option is to add and edit an existing form by choosing the right link to your form. In addition, you can choose what exactly must be shown on your Site. Therefore, you can collect responses from your colleagues, or show form results. Everyone can see a summary of responses right in SharePoint in Microsoft 365.
Power Automate
Microsoft Flow is a tool that helps you to automate organizational processes and better connect your software.
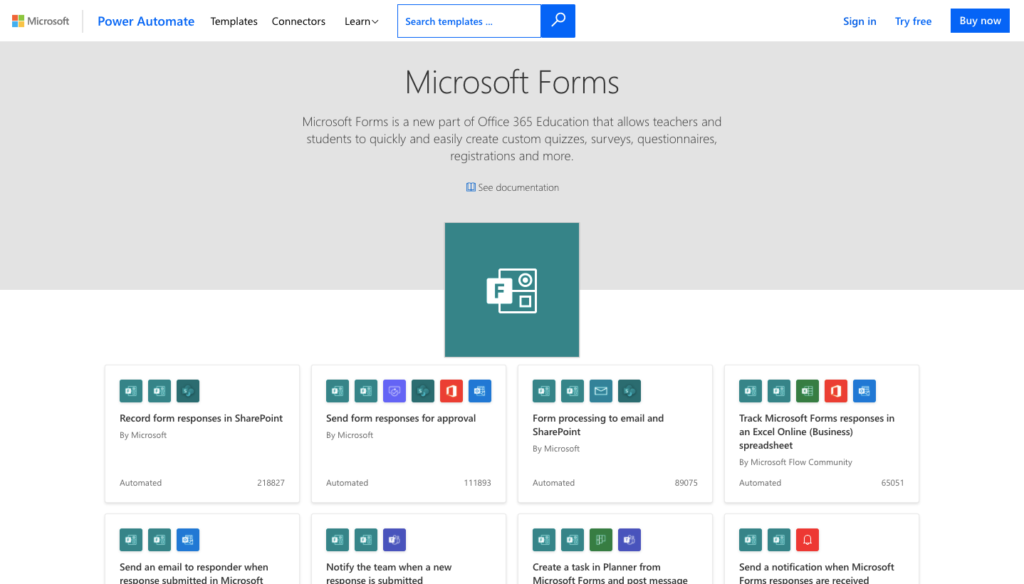
You can automate your connections according to your organizational needs. For example, you’re able to get response details from Microsoft Forms and send notification using the Microsoft Outlook service. Explore different templates and get inspiration, for example:
Track Microsoft Forms responses in an Excel Online spreadsheet. Learn more
Send a notification when Microsoft Forms responses are received. Try now
Create a Planner task when a form is submitted. Read more
Power BI
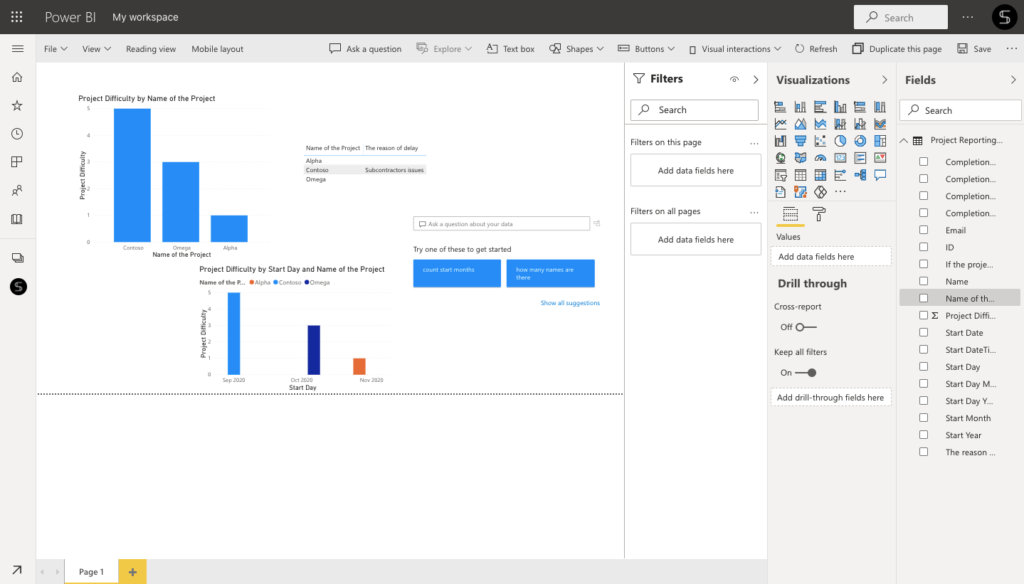
With Power BI you can build reports and analyze forms responses. You can import your Forms data right into Power BI to share the reports with power users on the web and mobile devices.
Therefore, you should first import the responses to your device using the “Open in Excel” button. Do not forget, if you use Excel online, all data will update permanently. In this way, you can track Power BI reports in real-time.
Next, just upload these responses to your new report in Power BI and use different visuals to build a report. Read more about Power BI Options here.
How to use Forms with Microsoft Teams
If you’re using Microsoft Teams, you can integrate additional apps for collaboration across your organization. There are many different use cases to integrate Microsoft Forms with Teams. You can create forms to collect project results, build quizzes for students, get employee feedback, prepare questionnaires for customers, and much more.
First, let’s go through different Microsoft Teams and Forms integration options in detail.
1. Add a Forms tab in Microsoft Teams
Choose the right Channel and add Microsoft Forms as a new tab. There you can create a new form or add an existing one, and your team can edit it. They can change different questions, suggest improvements, and customize your form. Hence, you can achieve better results thanks to collaborative teamwork.
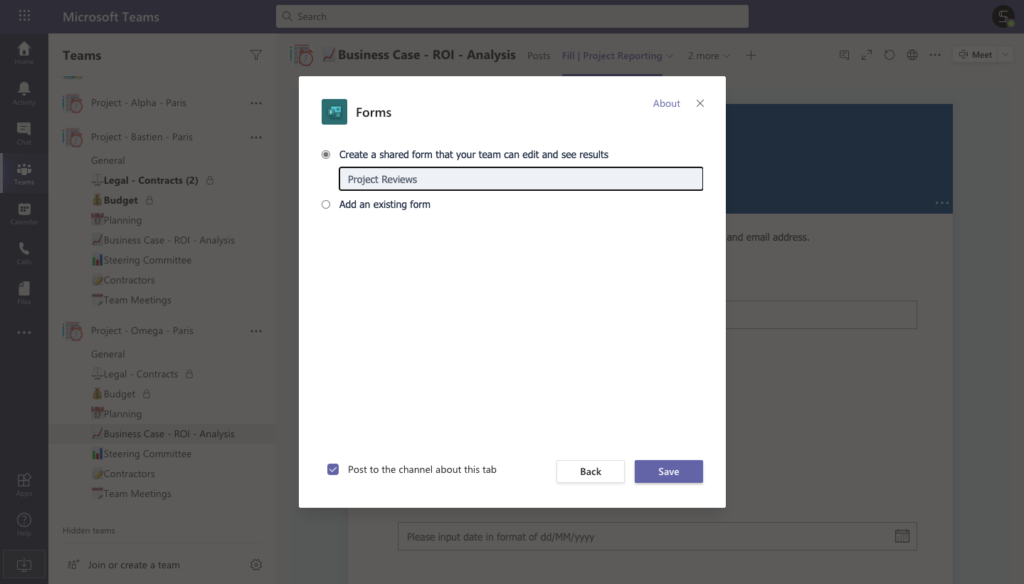
Next, you can collect responses by selecting the “Collect responses” option. You will see “Fill” in front of the tab title. This will allow your team members to submit the forms. As a result, you can easily collect project and sales results without jumping from one application to another.
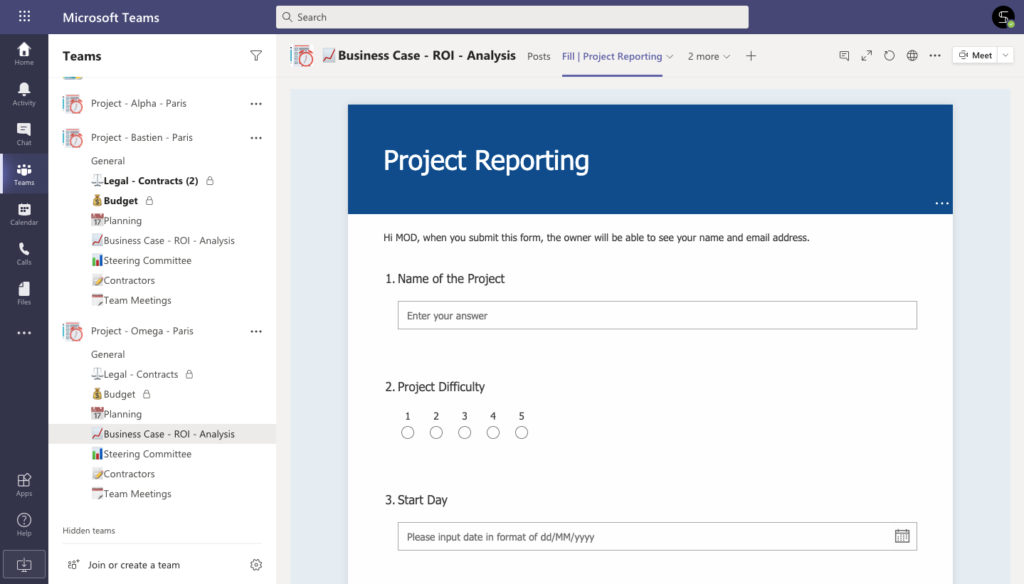
One more option is result sharing. Instead of submitting forms, your teammates can track the forms responses in real-time right from your Teams. Just select “Show Results” and allow your team to track collected responses in real-time with nice visuals.
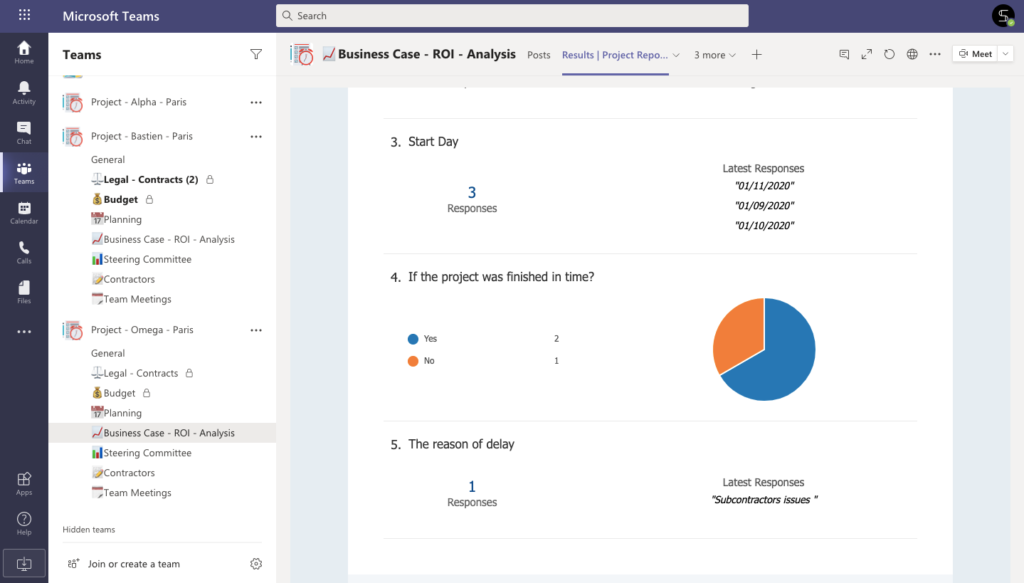
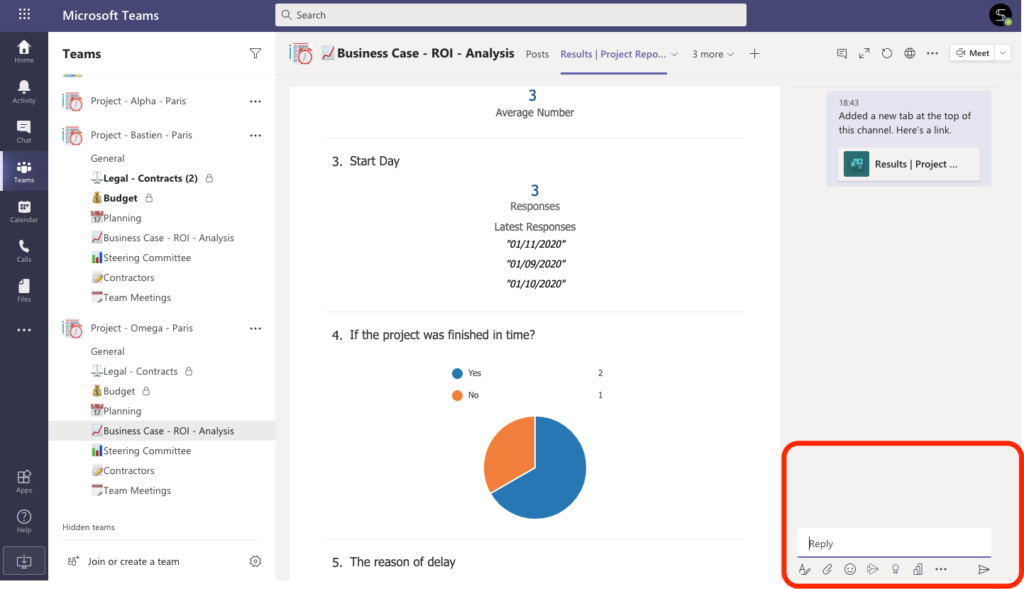
Your team can start a new conversation right in this tab to collaborate on different deals and improve your team results. They can communicate through Tab posts, attach files and links, and set up video meetings.
2. Set up notifications
To adapt your Microsoft Forms and Teams environment, you can easily set up notifications. With Forms connector, you’re able to keep your team up to date on the responses for your forms. Just choose the form you want to subscribe to, and the channel will be notified with a summary of responses each day
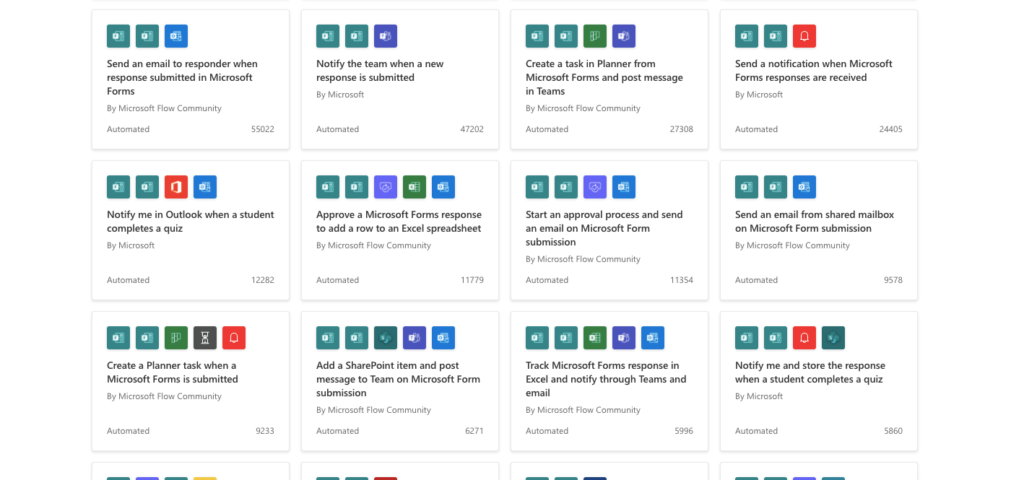
One more option is to use Microsoft Flows. As we mentioned before, you can build your own automated flow or use exciting templates, for example:
Notify the team when a new response is submitted. Learn more
Add a SharePoint item and post a message in Microsoft Teams about any Forms submission. Try now
Track Microsoft Forms response in Excel and notifies through Teams and email. Read more
3. Conduct a poll within your team
With Microsoft Forms and Teams integration, you can quickly create a poll. Just choose a channel and start to type your post. Next, choose the Forms icon, and create a poll with a question and different options. When people in your team take this poll, you’ll see real-time results in your group conversation.
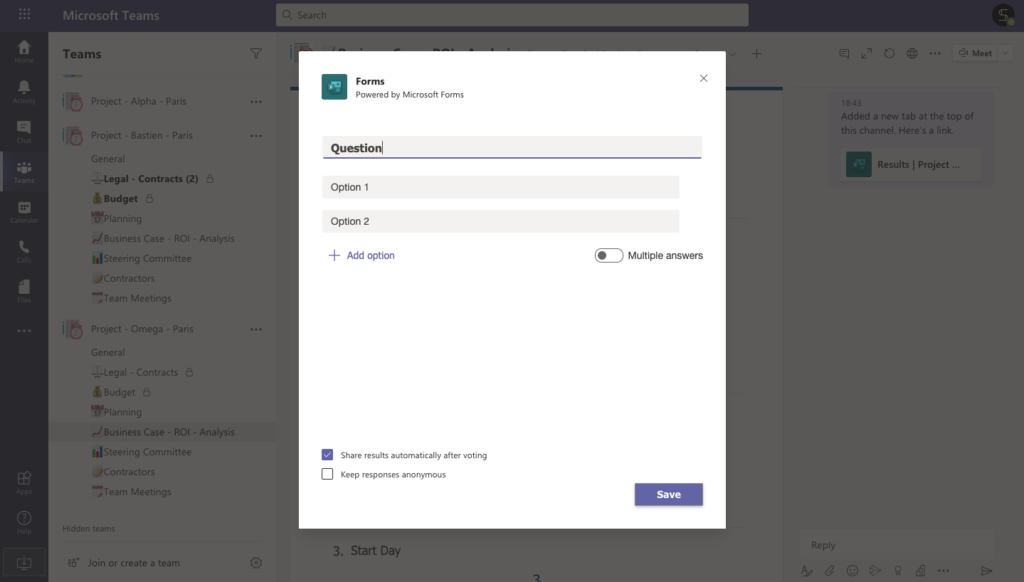
You can even just type @forms right in your new post and quickly build a questionnaire for your team members. They will see a poll with responses right in Teams channel conversation.
4. Share KPIs
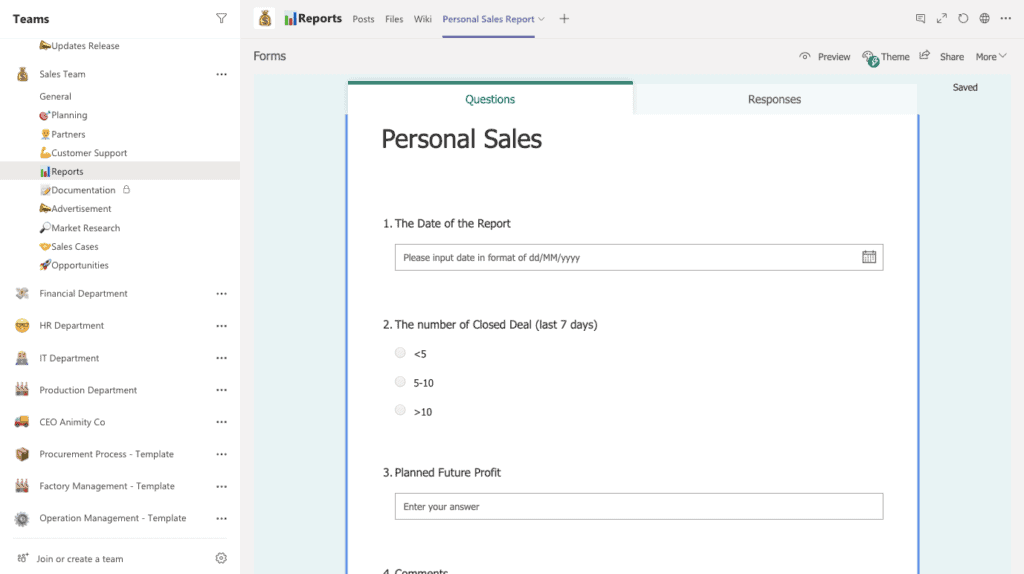
Let’s say you need to track sales levels across different teams. You can add Microsoft Forms directly as a tab in the sales team. So, your salespeople will have to fill out a form at the end of each week. As a result, you can easily track the level of compliance between the sales plan and the actual closed cases. If not, have a conversation via video meeting and find ways to increase sales with your team.
In addition, as a sales manager, you will be interested in comparing responses between different teams and assessing their effectiveness.
White Paper: Microsoft Teams for Sales Management
- How to use Microsoft Teams for Sales Management
- Create Teams templates for your sales processes
- How to connect Salesforce with Microsoft Teams
5. Gather employee feedback
Getting employee feedback is important in organizations today. This allows you to evaluate the effectiveness of the taken measures and quickly respond to changes.
To do this, you can add a form, in which you will collect the opinions of your employees about different innovations and changes in your team.
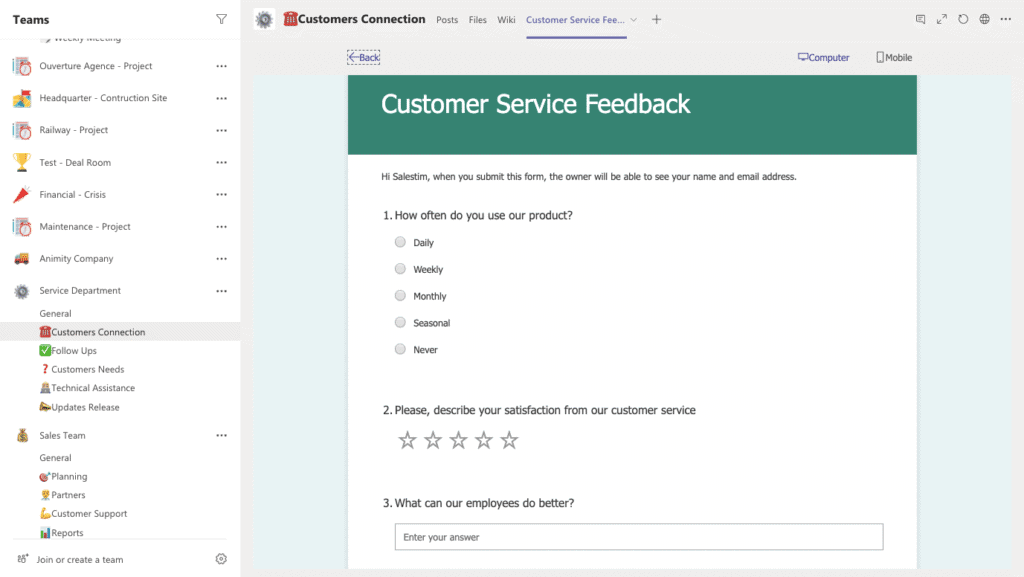
Let’s consider one more option. Let’s say you have a team where you can add existing customers as guests. Add a form to your channel for communicating with customers and let them quickly leave feedback about a product or service. This will allow your customer support team to quickly respond to problems and improve the quality of your service.
6. Share quizzes for employees or students
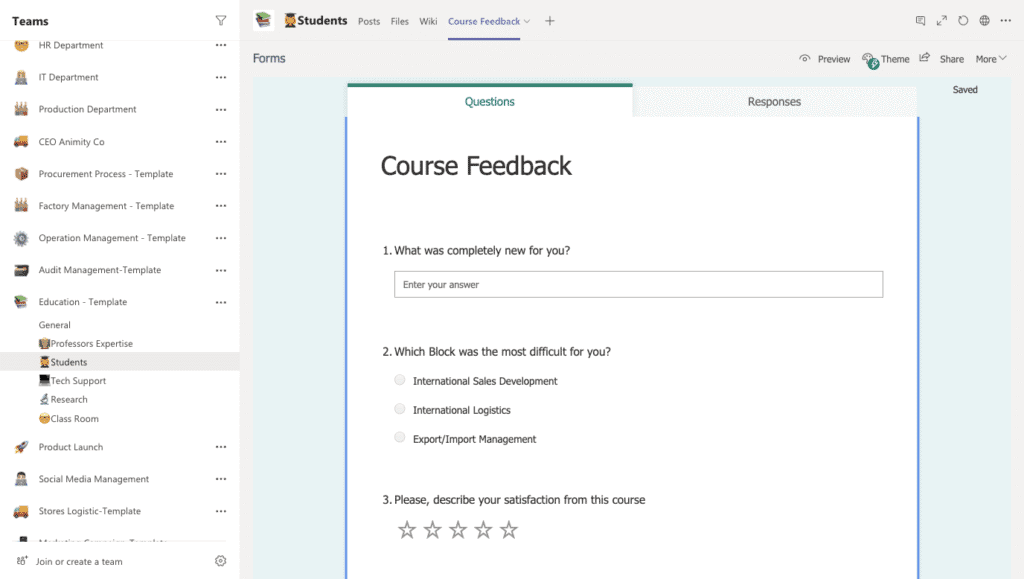
Test the knowledge of your employees with quizzes. The training process today is key to the development of your team. Add key questions to your quiz and analyze the effectiveness of the training provided, and the level of material learned
It will also be an excellent assistant for educational institutions working with students in a Teams environment. You can easily create screening tests for your students and assess their skill levels
Creating teams with pre-built Forms tab in Teams
Finally, let’s talk about how to improve your team collaboration with nBold. We can imagine that manually adding Forms as a tab to your teams in Microsoft Teams can be time-consuming.
With the help of nBold, you only need to create a team once, depending on your needs. Suppose as a project manager, you have to provide a team workspace for each new project. Look at the following steps to structure your workspace and save time:
1. Build a project team once with the required channels
2. Add the necessary project documentation there, such as guides and other docs that may be useful to your team
3. Personalize the tab by adding your familiar applications to them. Including, you can add a Microsoft Forms with which you can collect project results at the tab level
4.Next, you create a template from the Original Team you created and add to your own template catalog.
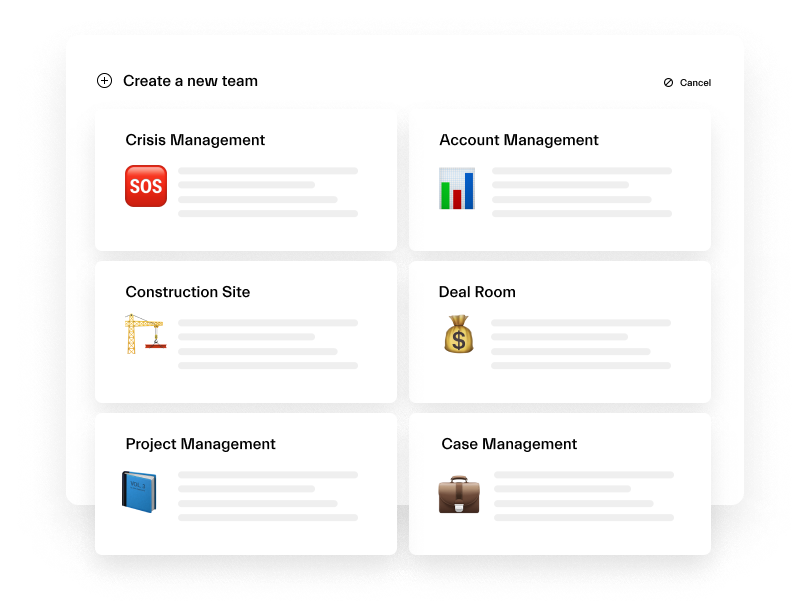
Done! Now your colleagues will be able to create teams directly from your catalog when they need to start a new project. What will they get? Completely copied team with Channels, Tabs with any Microsoft or 3rd Party App, Files, Members, and Settings.
In addition, during the New Template Creation, you can manage Collaboration Governance according to your IT needs. This includes:
- Dynamic and Static Naming Convention
- Approval Workflows
- Permanent Membership
- Private Channels Creation, and more.
