Wondering how to organize your data? We can imagine how difficult it is sometimes to structure and track information. In this article, we will talk about a perfect tool for organizing work – Microsoft Lists. In addition, we will discuss all the capabilities of this app, the use cases, and its integration with other Microsoft apps, including Microsoft Teams. Read to the end to learn how to scale Lists with Microsoft Teams templates.
What is Microsoft Lists?
Microsoft Lists is a Microsoft 365 app that can help you organize your work and track all needed information.
First, it’s a system of records: customer data, documents management, links tracking, and much more. With those smart and flexible lists, you’re able to collaborate and share any information with others in a structured way. Manage assets, track issues, collect customers’ data, and much more with smart rules and customizable views. Let’s look at the unique benefits of Microsoft Lists.
Useful Visualization
Firstly, you can visualize in many ways. Once you get your data into a list, you can see it in a standard grid view similar to Excel. At the same time, you can also view it in a card format and a calendar format. You can define what data in a card is visible or not.
Smart Rules Creation
During a new list creation, you can apply a lot of different smart rules to your Microsoft Lists. For example, you can manage notifications and send the alerts to anyone in your organization if an item is changed.
Easy integration with other apps
Finally, as a part of Microsoft Products, Lists can be integrated with other Microsoft apps. For example, you can automate processes with Power Automate, create lists in SharePoint, add Lists as a new tab in Microsoft Teams, and much more. We will talk about Microsoft Lists integrations later.
How to use Microsoft Lists?
Open the Lists app right in your Office 365 environment and you will see the home page, where you can create a new list. There you will see also your favorite and recent lists. So, there are a few options to create a list.
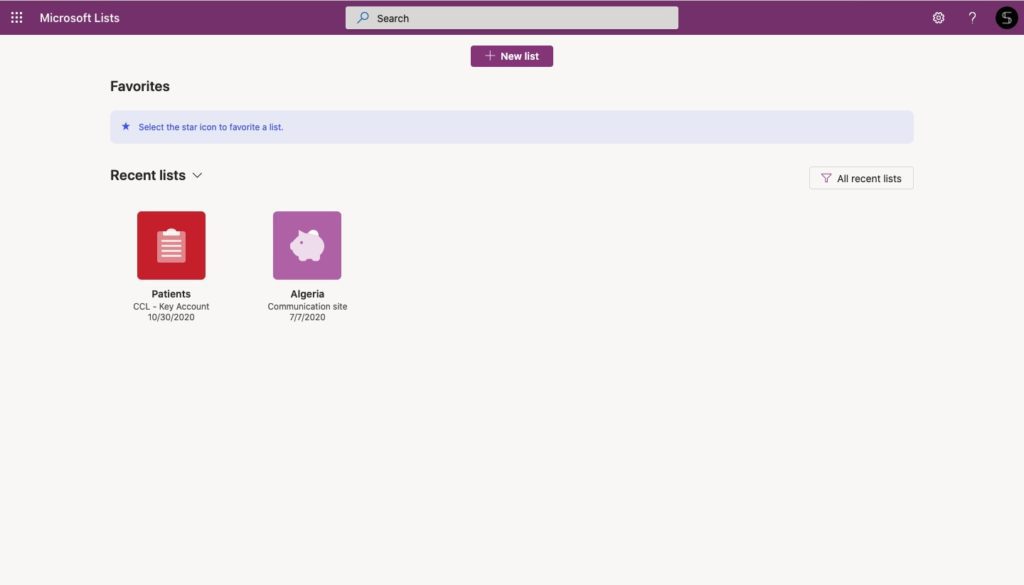
Create a new List
Use templates
What we really like is the list creation from existing templates. There you will see different examples according to the use cases. For instance, you can set up an issue tracker, employee onboarding, work progress tracker, and much more.
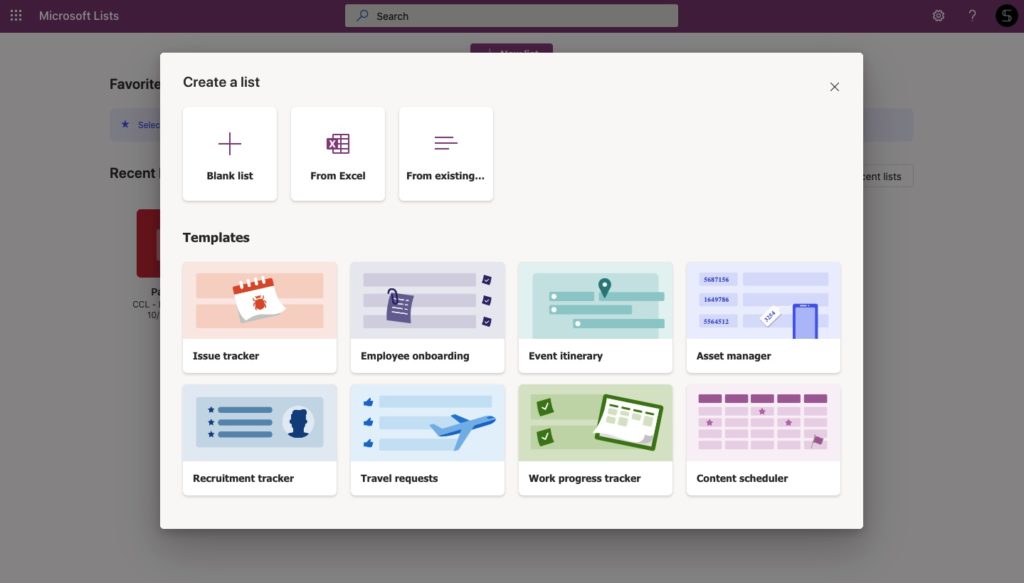
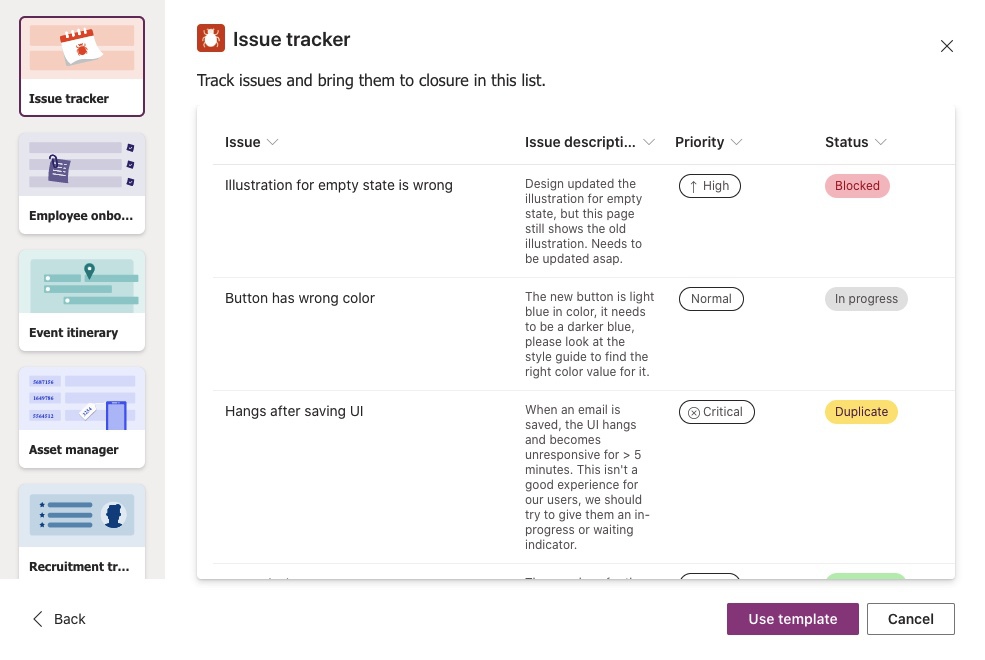
Let’s click into one of them to see how it looks like. If you click through all the several types, you will see the different fields and sections.
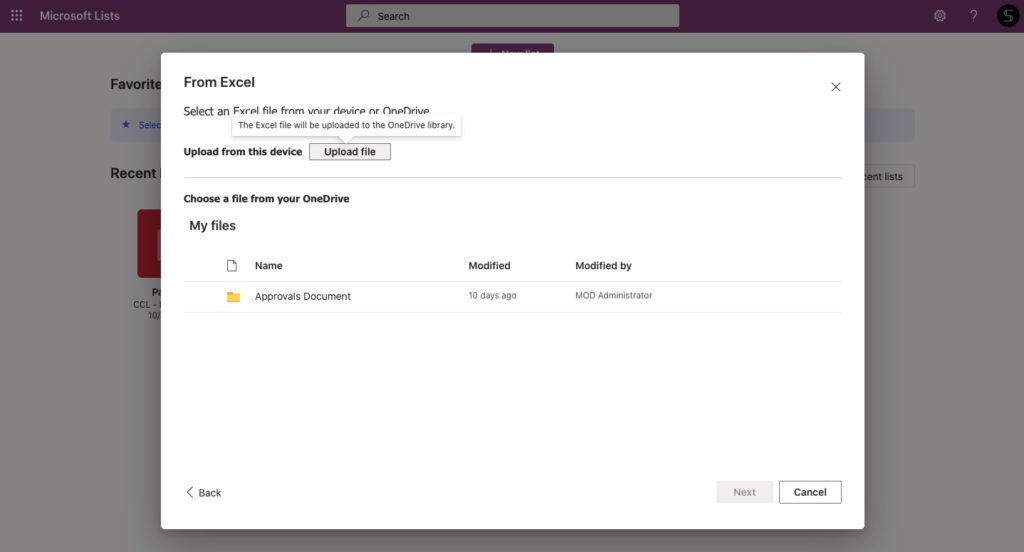
Import a list from Excel
You can also start from an Excel spreadsheet. Thus, when you bring the data, you can define what the data schema is.
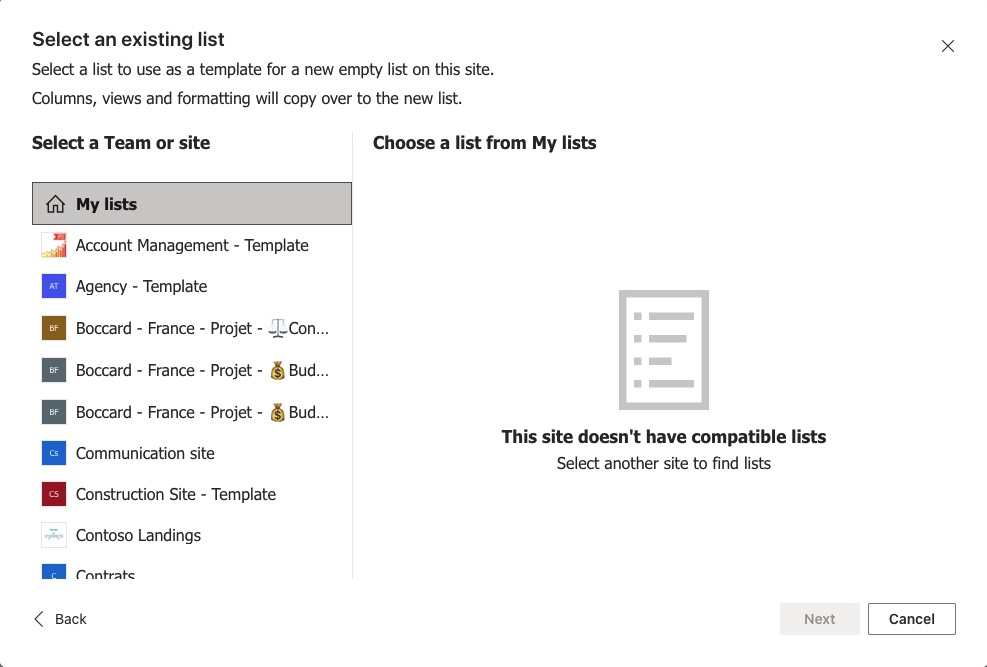
Create from an existing list
If you had an existing list and you would like to use that as your baseline, you could reuse all the structure and even business rules.
Start with a Blank list
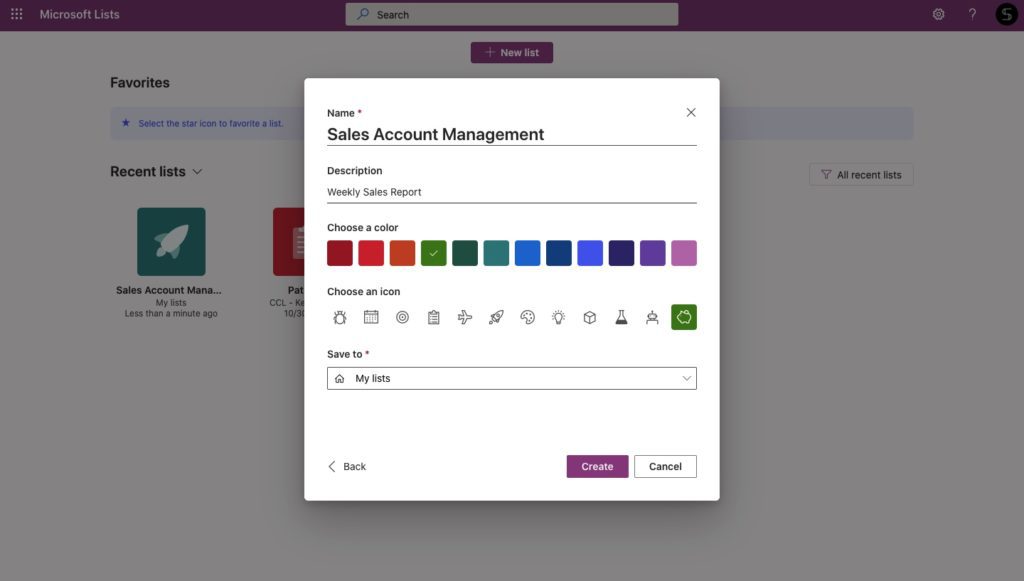
This is a blank canvas, and with this option, you can design the list and define its structure. When you click on create a blank list, you can give a name and description of your new list. In addition, you can customize it by choosing a color and an icon.
→Download White Paper: How to Use Microsoft Teams for Sales Management
After the first settings, you will see a new blank and now you can create a list however you want. At the top, you will see different columns that you can scale according to your needs.
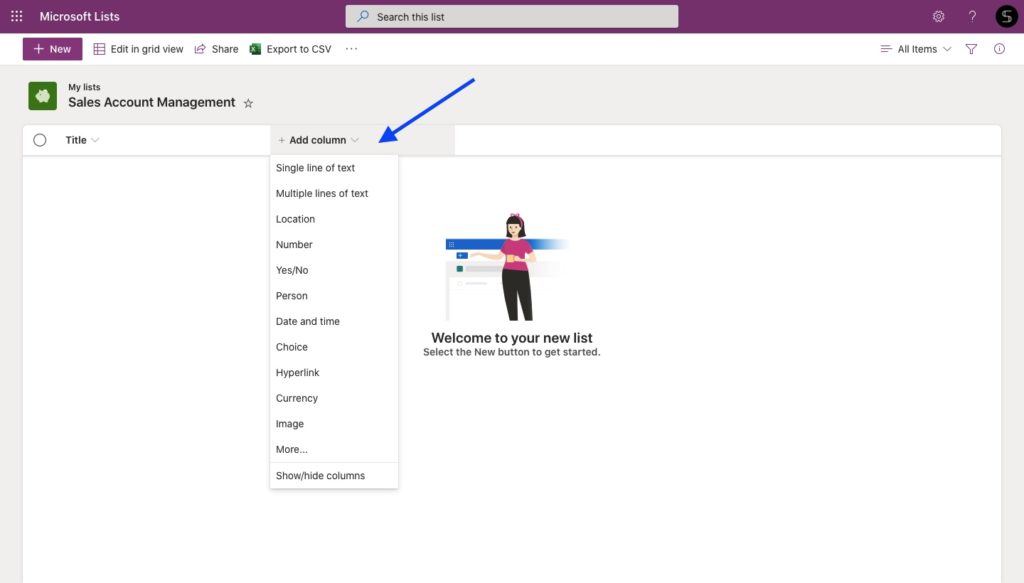
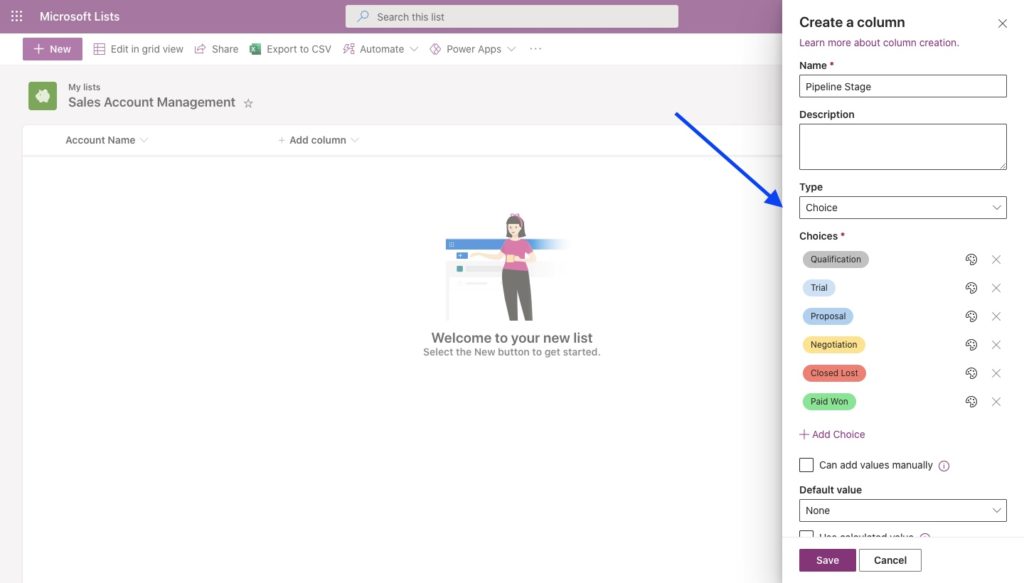
If you click on +Add new column, you will see many different options. Let’s say, you would like to add a number. This opens a pane where you can set many different attributes for your new column. For example, you can define the data type or the number of decimal places.
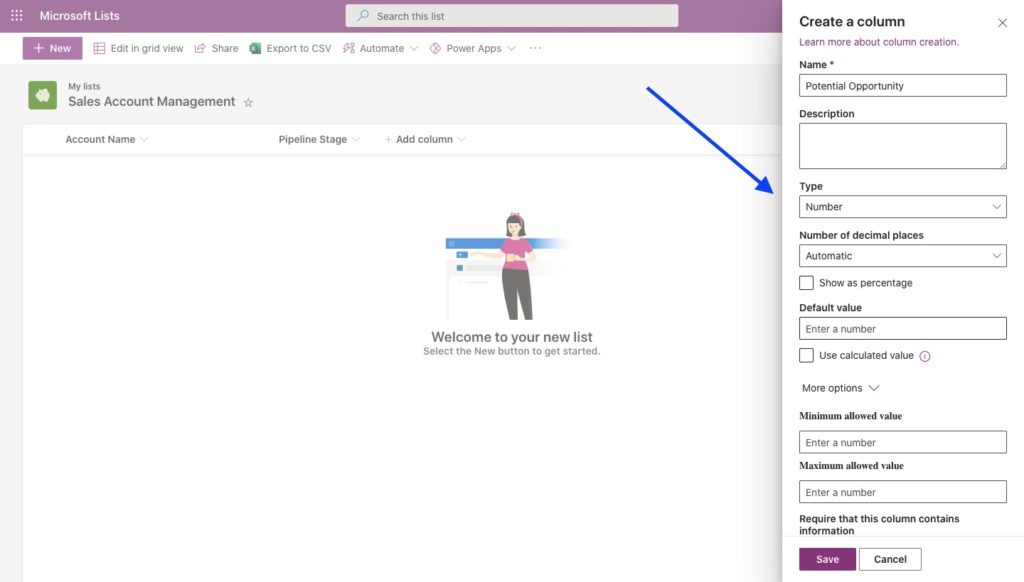
There are many different options for a new column. For instance, you can choose the location, any person in your organization, date and time, link, choice, and much more. The choice column may be very useful for you. For example, you can choose to track the project status. Here you can define what your choices are. Type the different choices, define colors and easily track any changes
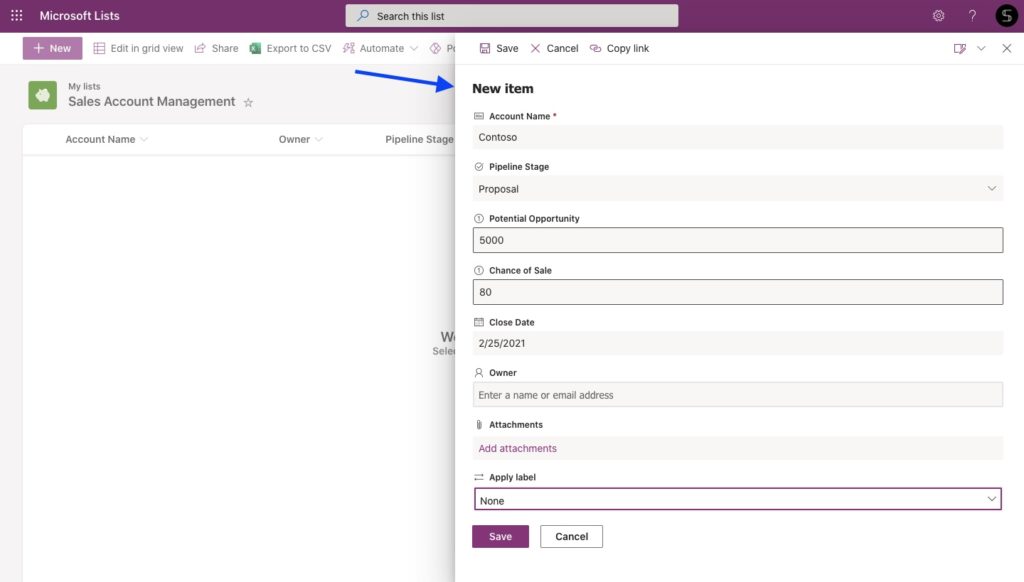
After all column settings, you can add your data. By clicking on +new, you will see a pane and a form where you can all of the data. One more way to add a new item is to edit your list in grid view. This will allow you to edit your list as in Microsoft Excel.
Customize your Lists
You can customize your lists in different ways. Let’s say, in the number column, you would like to really get a sense of how big or small this data is.
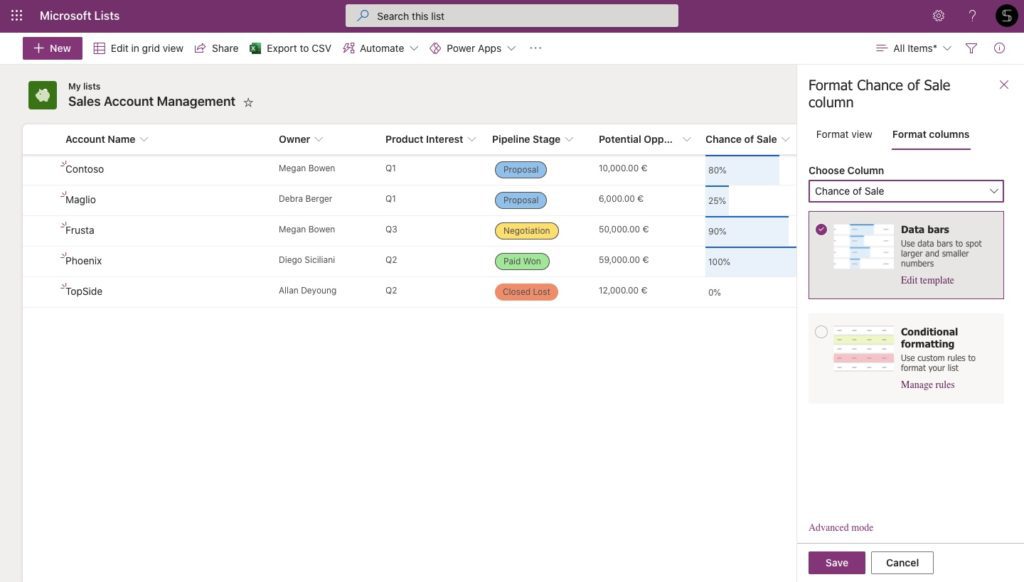
For this reason, you can click on the column header and set different column settings. For instance, you can format this column. You can use the data bars to help very quickly visualize how big or small the data are. Explore different conditional formatting to improve your experience with Microsoft Lists.
Collaborate on Lists with your colleagues
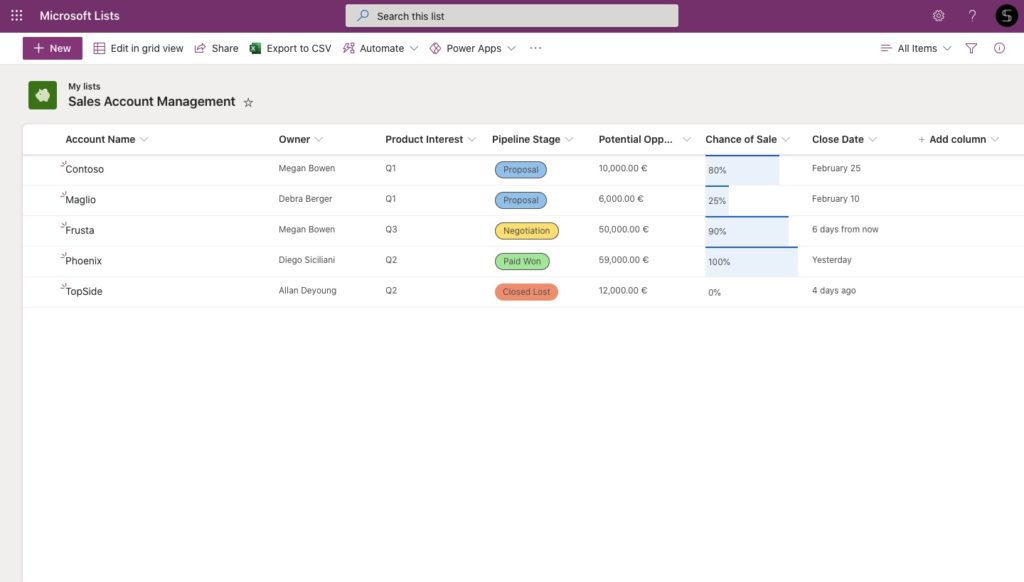
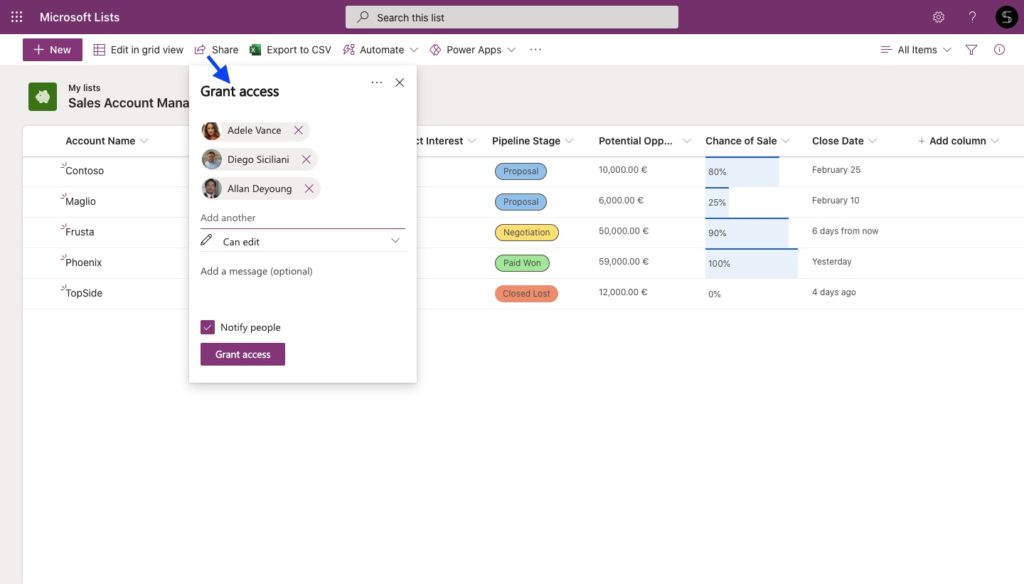
When the list is ready, you can share it with other people. To do so, just type in the name or email address of any person in your organization. Also, you can set what type of permission they will have: the full control or just view permissions. With this option, you can collaborate on data with colleagues across your organization.
Microsoft Lists with Power Automate
As you may know, Power Automate allows you to automate work processes and simplify daily activities. There are many options on which flow you can build: from notifications to complex business processes tracking. You can read more about Power Automate here.
In this case, we would like to share with you how you can simplify and automate your data management with SharePoint and Power Automate.
Microsoft Lists is an app based on SharePoint Lists technology. Each of your new lists is located on SharePoint Site. Thus, trying to build your automation flow, you will need to search the SharePoint items as a trigger or action. Let’s see, on very simple examples, how you can improve your work experience.
Use Power Automate Templates
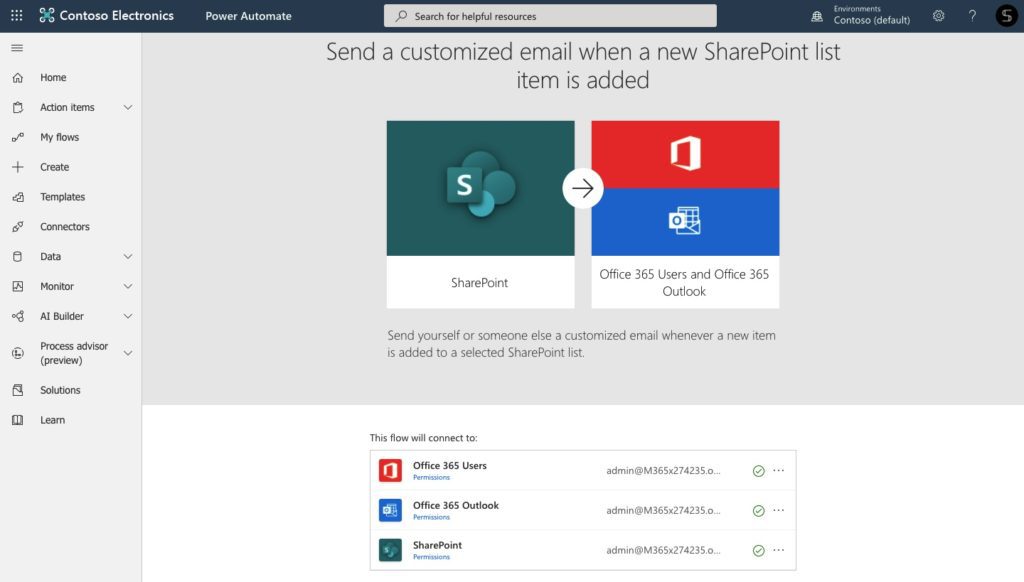
At the very beginning, you can search for the different Power Automate templates that someone has already built. For example, you can send a notification email when a new SharePoint list is added. Use this Template.
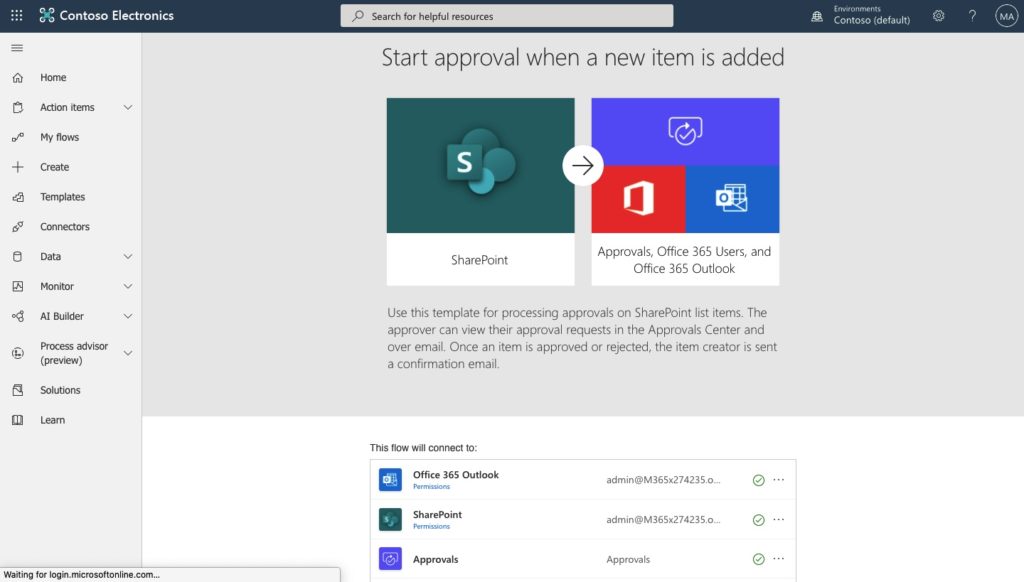
Next, you can start an approval process if a new item is added to your particular list. It’s a useful feature to manage important documentation quickly and simplify approval processes. To build this flow, use the template and connect your Lists with Outlook and Approvals app.
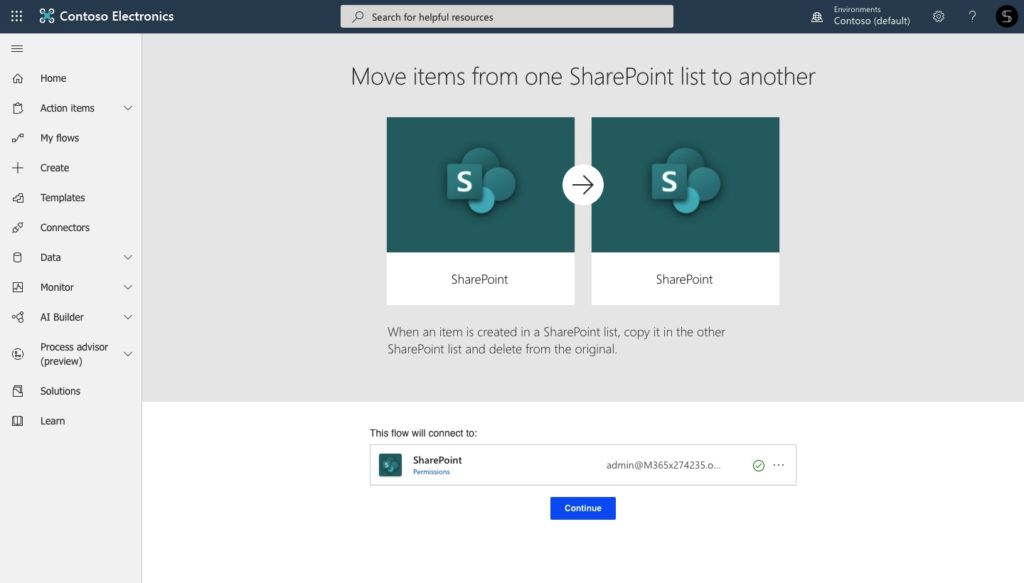
Finally, you can move different items from one list to another. This template allows you to save your time and manage content automatically
Manage CRMs
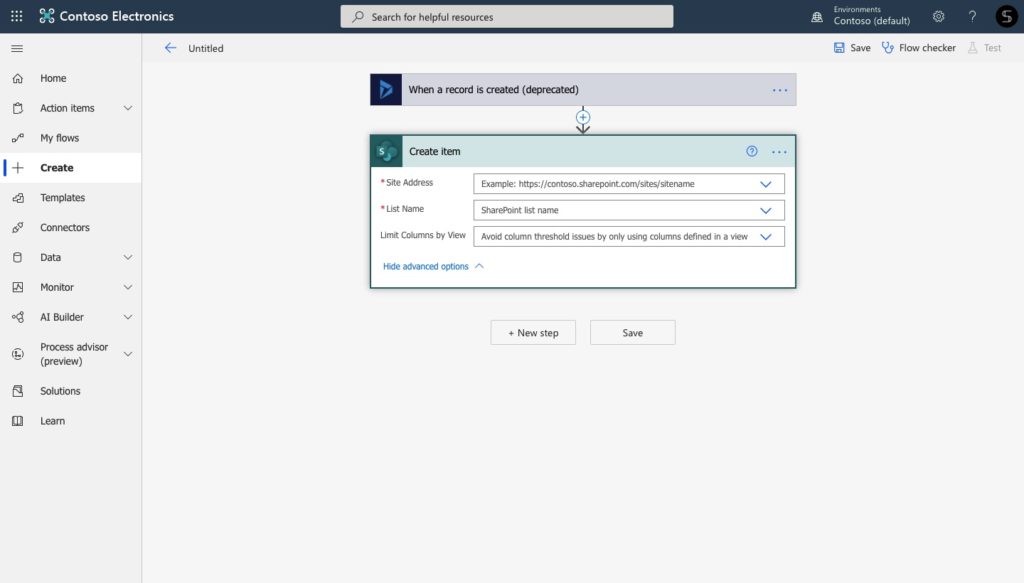
With Microsoft Lists, you can manage all information about your prospects in one place. In addition, to stay informed on any changes and reduce manual tasks, you can use Power Automate. Build an automated flow using Dynamics 365 and Microsoft Lists. Thus, each time when a new record is created, it will be automatically added as a new item to your Microsoft List.

Guide: Microsoft Teams and Salesforce Integration
- Why you should integrate Salesforce with Teams
- All integration possibilities
- Most demanded use cases
- How to set up the integrations
Get email notifications
Let’s see one more example. Imagine, you’re working in customer support. Each day you’re getting different feedback from your users about the stable functioning of your mobile app. If there is an issue, you will need to fix that in a particular item in your “Issues Tracker” list. But how will your engine department be notified to solve the issue as soon as possible?
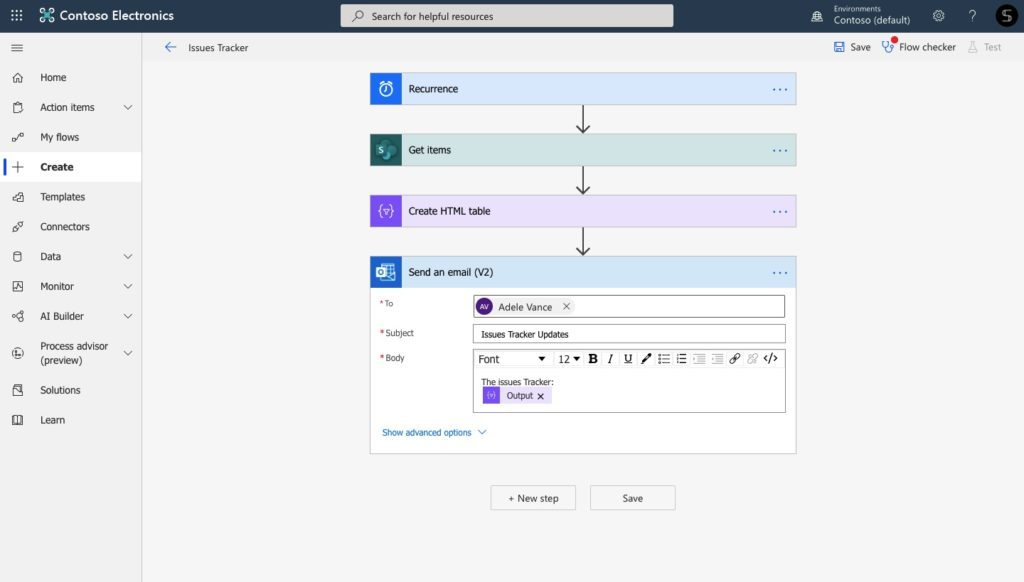
To do so, you can create a scheduled Power Automate flow, that will send the email notification each morning with a condensed report. To build this flow you can connect Microsoft Lists and Outlook and send a customized email with an HTML table inside.
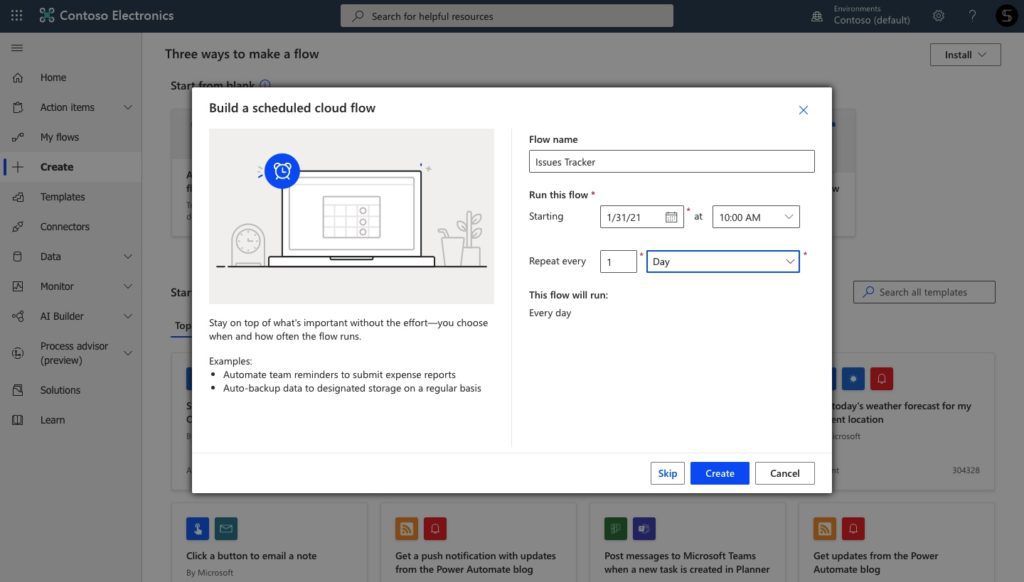
Just set up the data for Scheduled Flow, choose the right data from your Microsoft Lists and customize an email notification.
Lists with Microsoft Teams
As we’re talking in our blog about Microsoft Teams efficiency, let’s explore the benefits from Microsoft Teams and Lists integration. Microsoft Teams is a great tool that allows you to stay connected with your colleagues and collaborate on different projects in one place. What we really love here, is the ability to connect any Microsoft or 3rd party app right to your Teams channels. And of course, you can add any of your existing Lists or create a new one right in your Microsoft Teams Environment
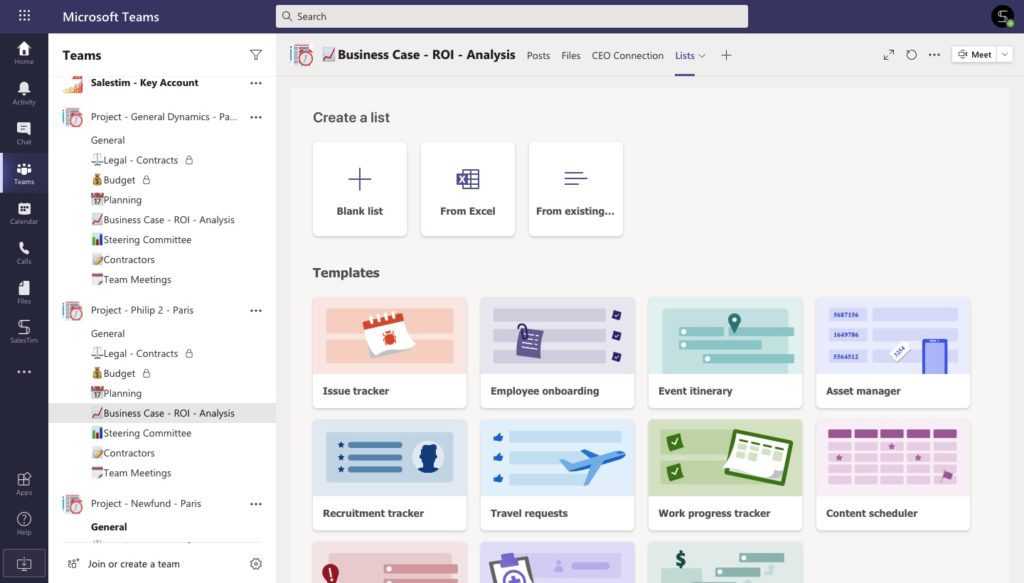
Add Lists as a new tab
Teams tabs give allow you to bring in a Team-based List, which exists inside a team SharePoint site or any other. In addition, you can create a new list from a template, from Excel, or from scratch. In fact, you will get all capabilities of Microsoft Lists right in your Teams channel. And don’t forget that Microsoft Lists are flexible with smart rules, Power Automation, Actionable Message, etc.
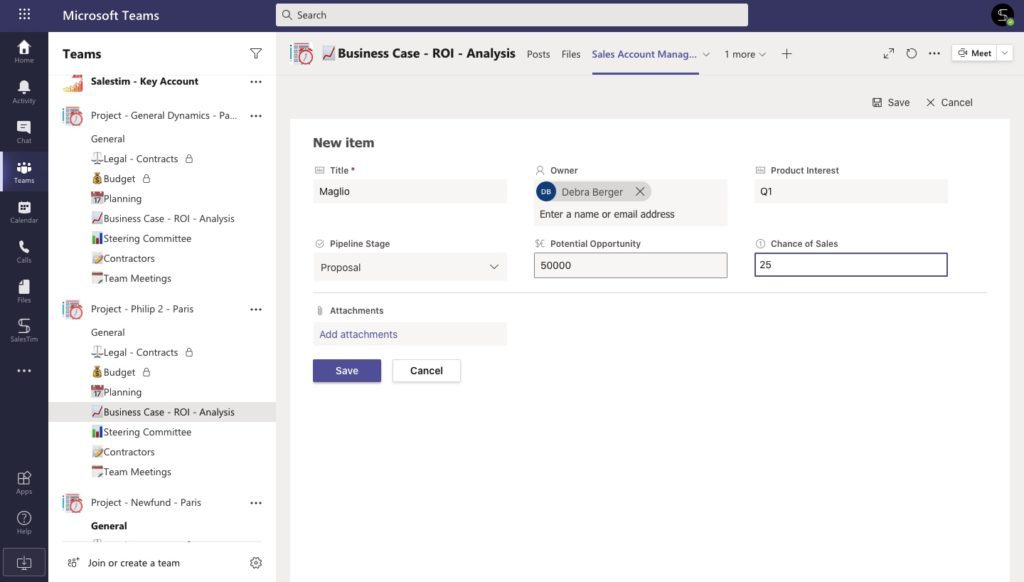
Collaborate on Lists with your team members
Here, you can communicate with your team members on the different Lists using a chat. Also, you can mention individuals to ask questions, provide feedback through conversations and start video meetings to discuss critical deals.
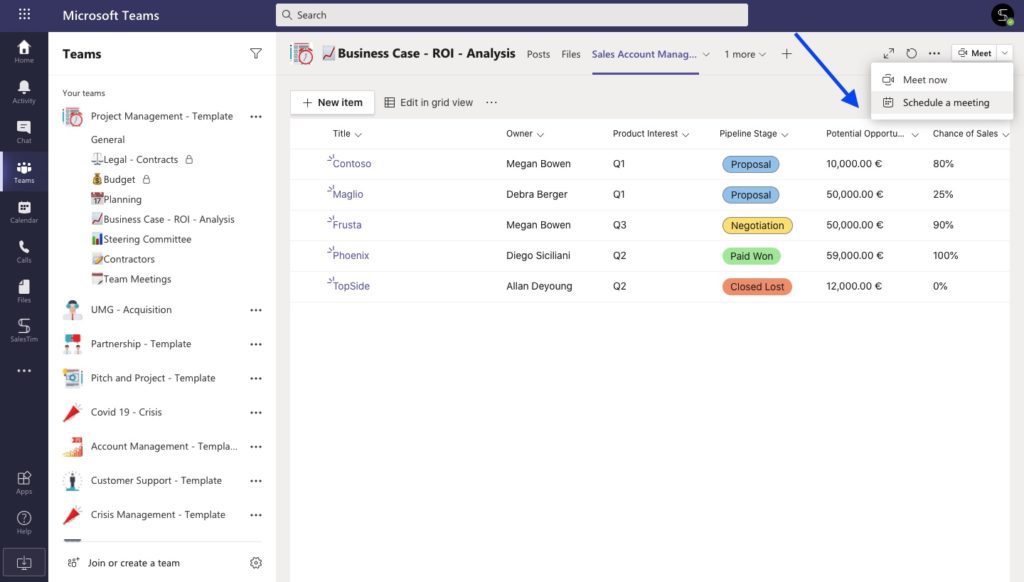
So, let’s summarize the key capabilities of Microsoft Teams and Lists Integration:
- Add the Lists tab to any channel (by choosing an existing list or creating a new one from scratch or templates)
- Add columns of all supported data types (currency, date, numbers, files attachment, etc.)
- Edit the content to perform bulk edit operations
- Sort, filter, and manage views
- Start conversations and share List items directly inside Teams
- Create smart rules and use Power Automate connectors based on Teams Triggers
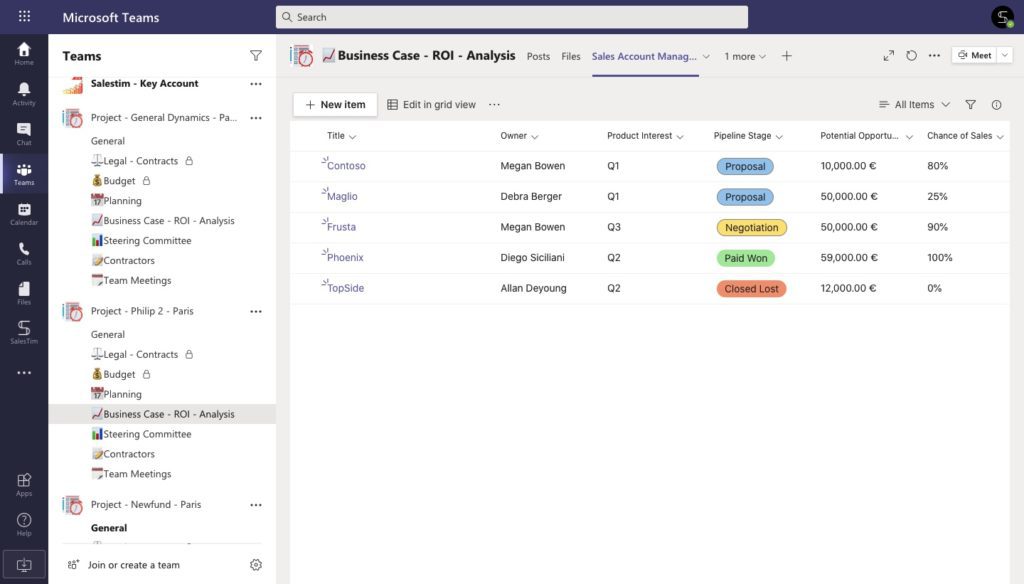
Use cases for Microsoft Lists with Teams
Now, we will explore use case examples to see how you can use Microsoft Teams with Lists.
Collaboration on sales
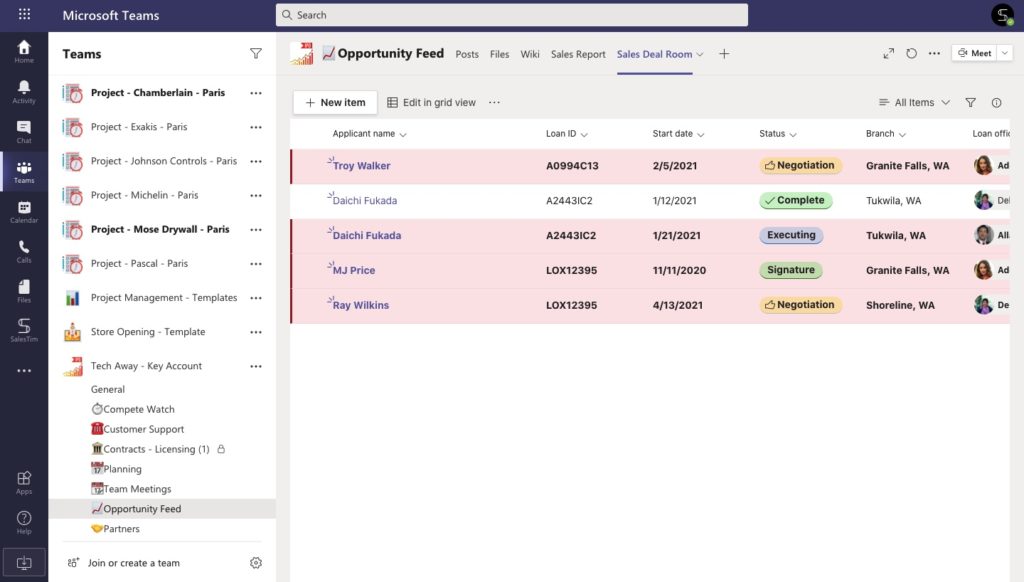
Let’s say you manage a sales team. One of the options for how you can track customer information is to enter key leads directly into Microsoft lists (We previously described how to automate the data update process using Power Automate)
So, you can create various columns with useful information, discuss any changes with colleagues right in the Teams Tab. In our example, we have created columns that contain information about:
- Company name
- Additional Information
- Start date of negotiations
- Sale stage
- Branch
- Owner, etc.
Document management
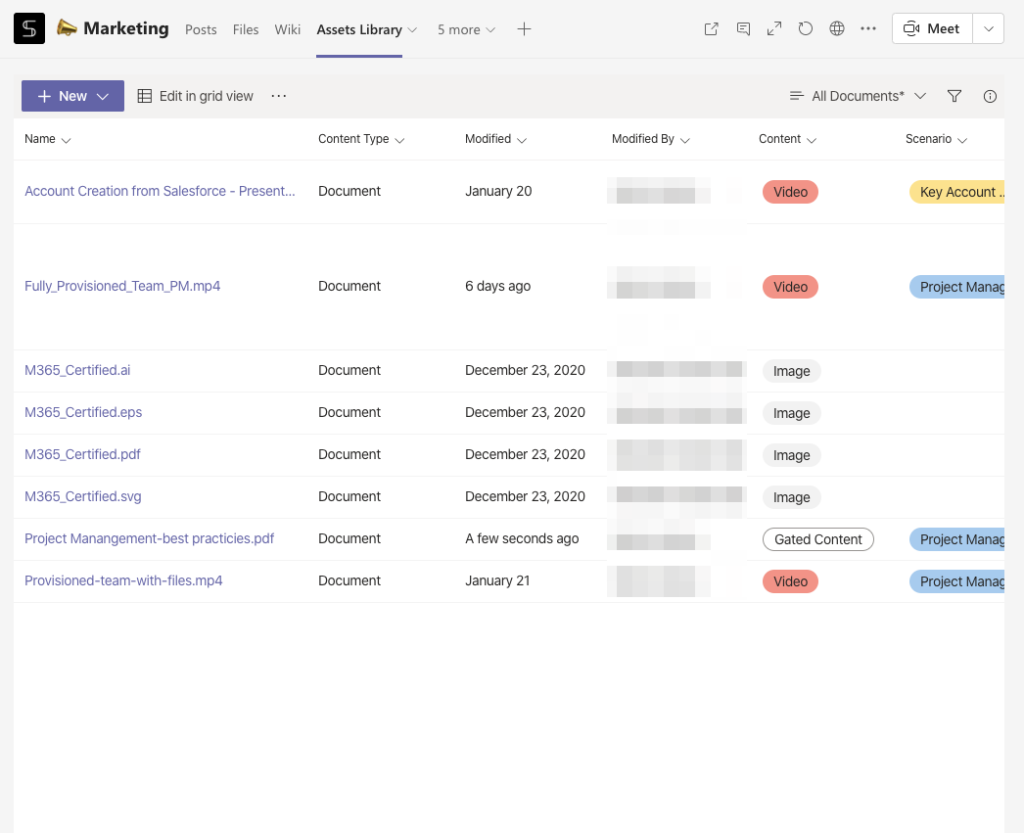
Another way to use Microsoft Lists is to help you organize your documents. Do you know a situation when you urgently need a file, you definitely shared it somewhere in the Teams environment, but it takes too long to find? Trust, at nBold we know how this feels.
In the marketing department, we create a lot of content every day. Pictures, screenshots of our application, videos, guides, and so on. We got tired of spending a huge amount of time looking for the desired file and we started creating the Assets library, where each file can be sorted depending on many aspects. Below you will see our insider 🤫 , but we hope that this example will inspire our readers and help someone.
Inventory tracking
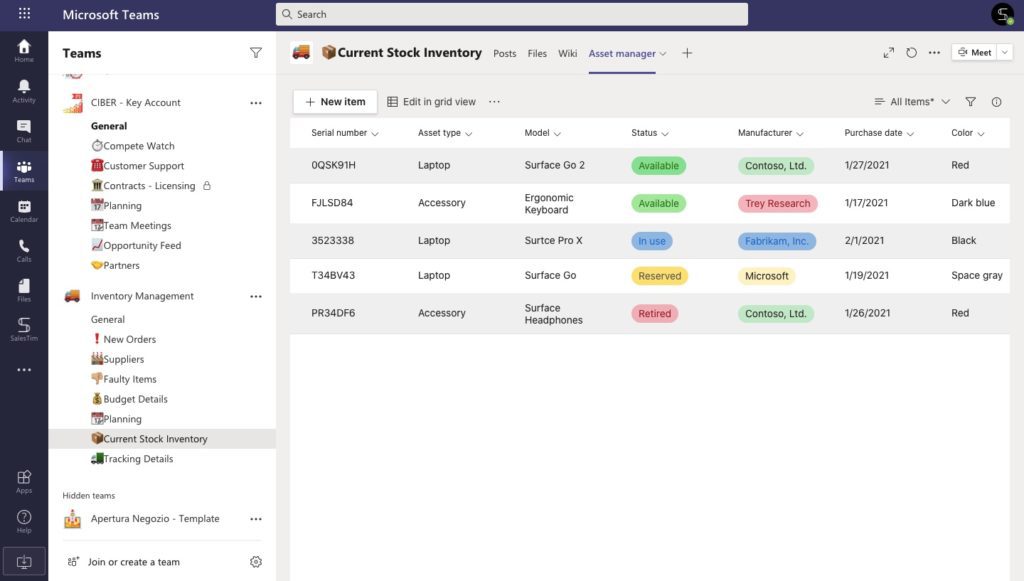
Microsoft Lists can also be used to track inventory within Teams. This can be particularly useful for teams that need to manage supplies or equipment across multiple locations. With Lists, you can track inventory levels, set reorder points, and monitor usage. For example, a school district could use Lists to manage inventory for its various schools, tracking items like textbooks, laptops, and projectors. You can track inventory levels, set reorder points, and monitor usage through custom views that show the status of each item.
You can create the following columns for your Microsoft Lists:
- Product Name
- Category
- Model
- Status
- Supplier
- Purchase Date, etc.
Event planning
Microsoft Lists can be a great tool for planning events within Teams. With Lists, you can create checklists, assign tasks, and track progress. You can also use custom views to show the status of each task and monitor progress. For example, you could use Lists to plan a company picnic, with different columns for tasks like catering, entertainment, and decorations. You can assign tasks to team members, set due dates, and track progress through custom views that show the status of each task.
Expense tracking
You may also want to use Microsoft Lists for expense tracking within Teams. This can be particularly useful for finance teams that need to track expenses across multiple departments or projects. With Lists, you can track expenses, assign categories, and monitor spending. You can also use custom views to show the status of each expense and monitor spending. For example, you could use Lists to track expenses for a marketing campaign, with different columns for expense reports, expense categories, and spending amounts. You can assign expenses to different categories, set budgets, and track spending through custom views that show the status of each expense.
Scale Microsoft Lists with Collaboration Templates
nBold is a collaboration process technology that helps organizations improve their collaboration processes at scale with:
- Collaboration Templates
- Collaboration Governance
- Advanced 3rd party apps integrations with nBold APIs
How nBold can help you to scale Lists with templates? So, very simply you can build Collaboration Templates with all needed content: Private and Standard Channels, Files and Folders, Pre-built Planner, Tabs with Apps, and much more.
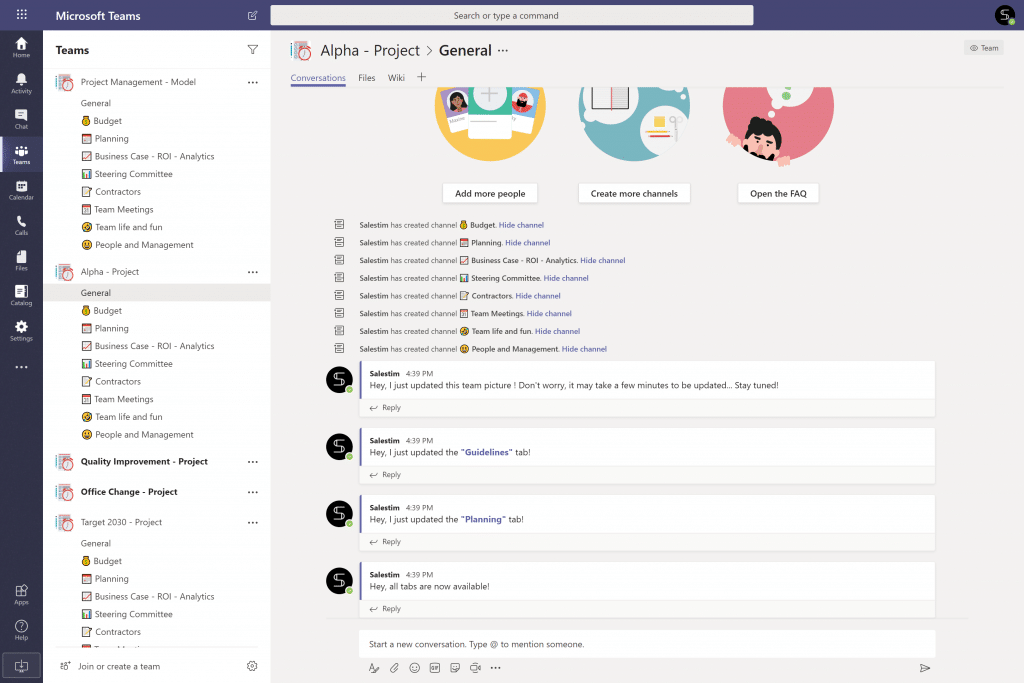
Thus, you can just once build the Original Team with all needed content. And of course, you can add any Microsoft Lists as a tab. Guidelines, Documents Library, and any Lists with all Pre-built structure and smart rules.
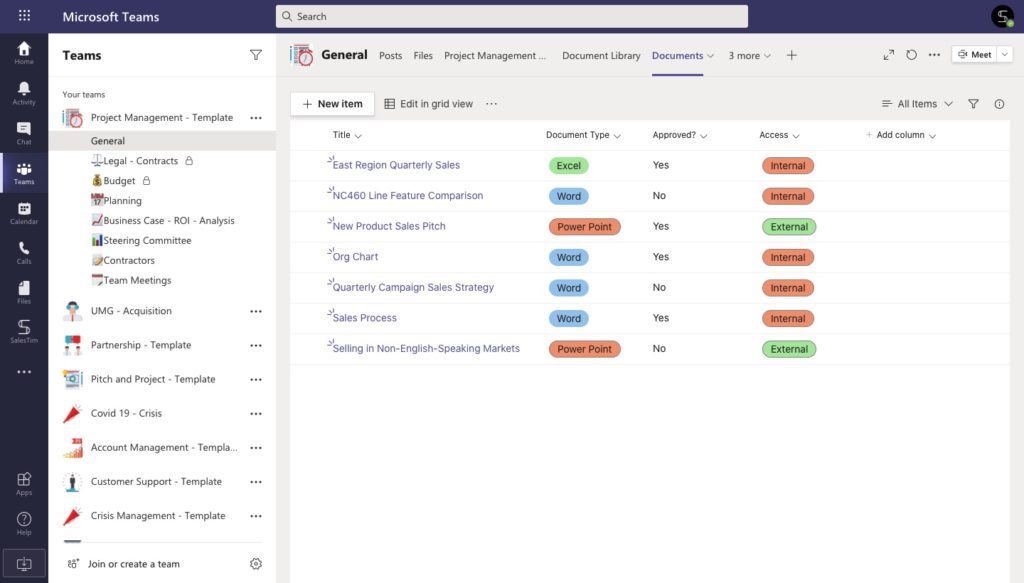
Next, you will need to create a template from the original team. During template creation, you can manage Governance Policies, such as Naming Convention, Private Channels Management, and much more.
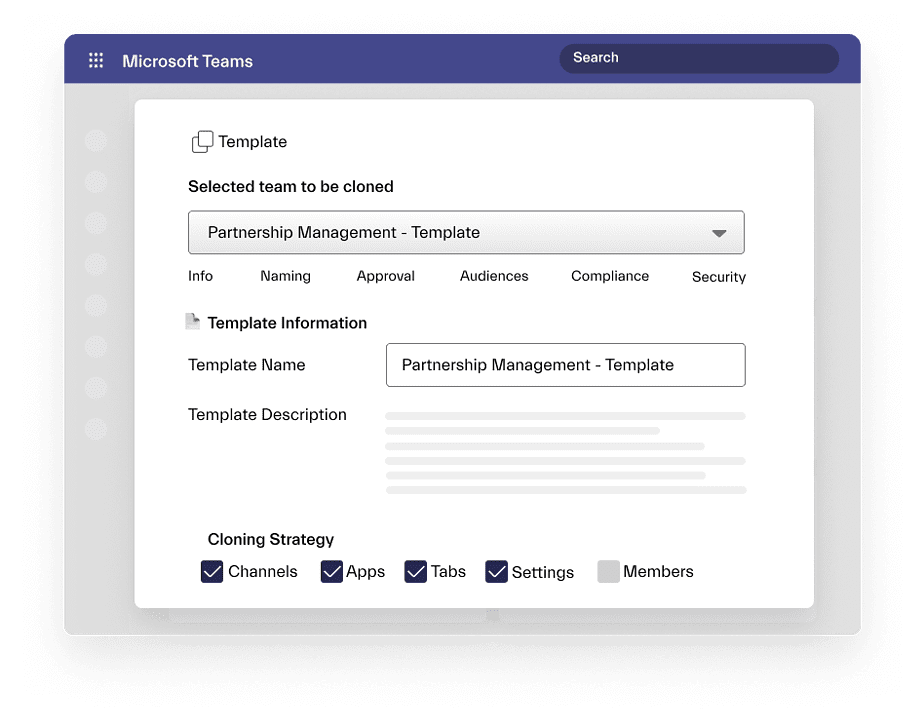
After template creation, it will be automatically added to your own Template Catalog. Create dozens of teams according to your use cases: project management, sales deal room collaboration, new store opening, and much more.
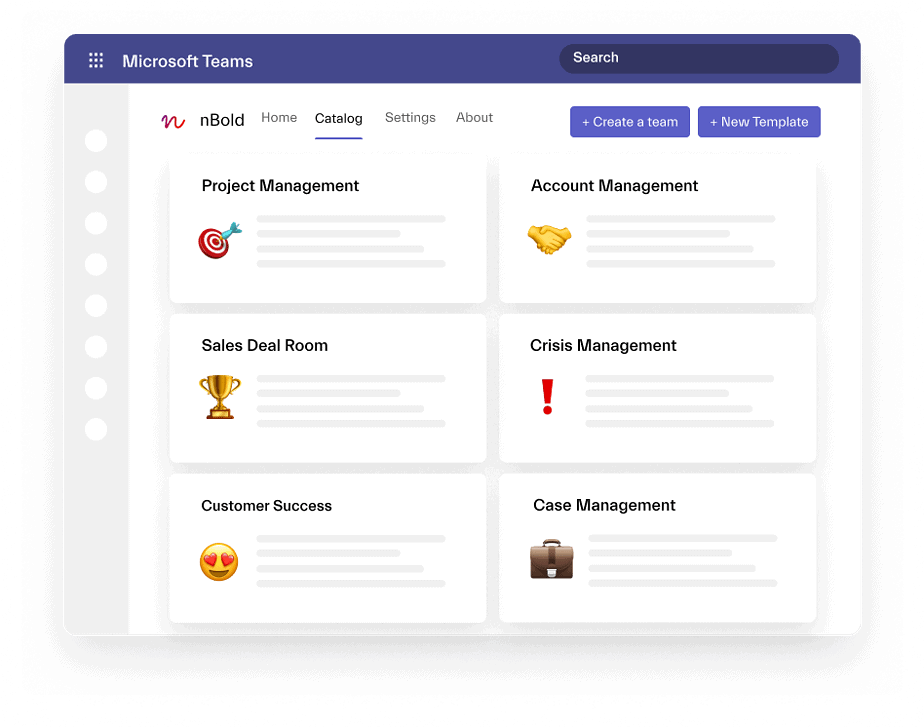
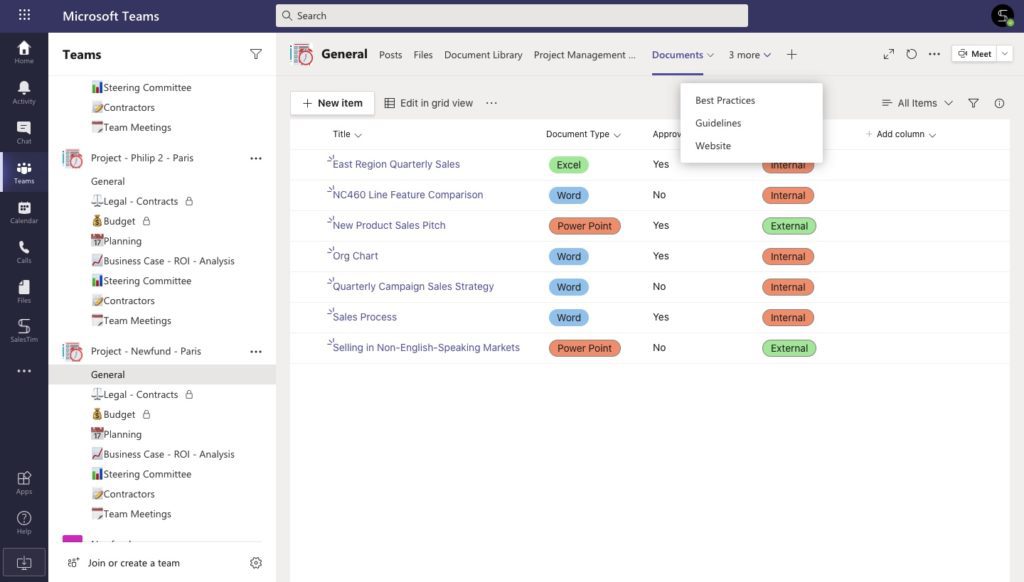
And that’s it! Next time, instead of manual teams creation, your end-users will create different teams from your own Templates Catalog. As a result, they will get the fully provisioned team with all needed content:
- Standard and Private Channels
- Files and Folders Cloning
- Ready to go Planner
- Tab with Microsoft Lists is here as well!
Sounds good? Start your trial and improve your collaborative processes at scale!