You might have heard you can collaborate on documents with your colleagues in Microsoft Teams. Or perhaps you’re already doing it, but you would like to explore some best practices to be more efficient. Either way, you’re in the right place! In this blog post we’ll give you step-by-step instructions on how to effectively collaborate on documents in Microsoft Teams.
Adding a document to Microsoft Teams
First thing first. Before you start collaborating on a document in Teams with your peers, you need to create or upload one.
There are several ways to do upload files in Teams: either by directly attaching them to your channel or chat conversations, or by doing it in the Files tab in a channel. You can also upload them directly in the team’s SharePoint site, but more on that later.
We do recommend you stick to the second option. It all comes to how files are stored when you add them to Microsoft Teams. We’ll delve into that in a few moments. But first, here’s how you do it:
- Choose the team where you’d like to create a new document.
- Select a relevant channel.
We took a Marketing Campaign team as an example and we’re adding a Campaign strategy document in the Planning channel.
- Click on the Files tab.
- Choose the right folder, if needed.
- Click +New or Upload.
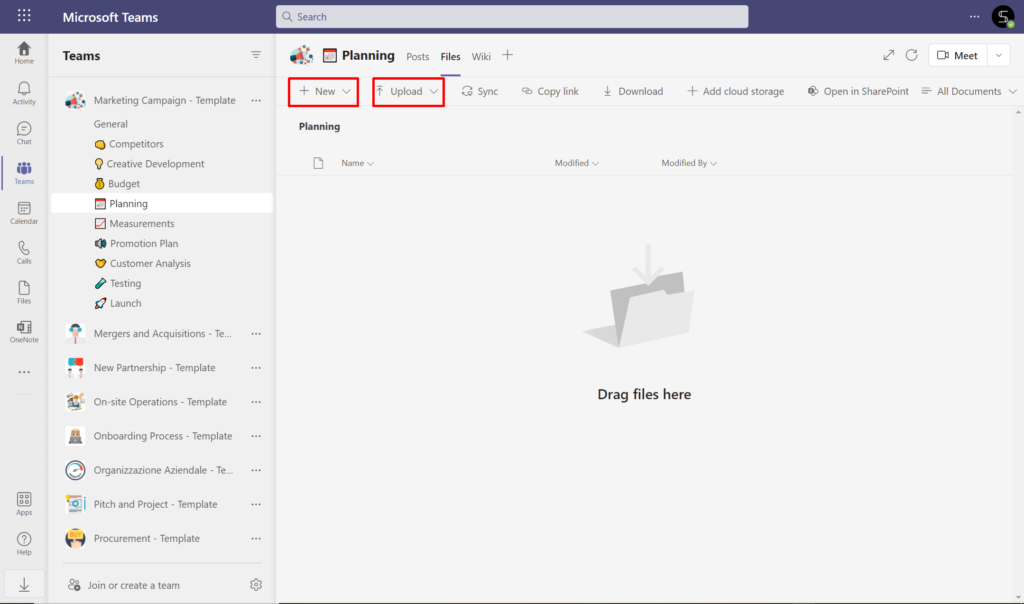
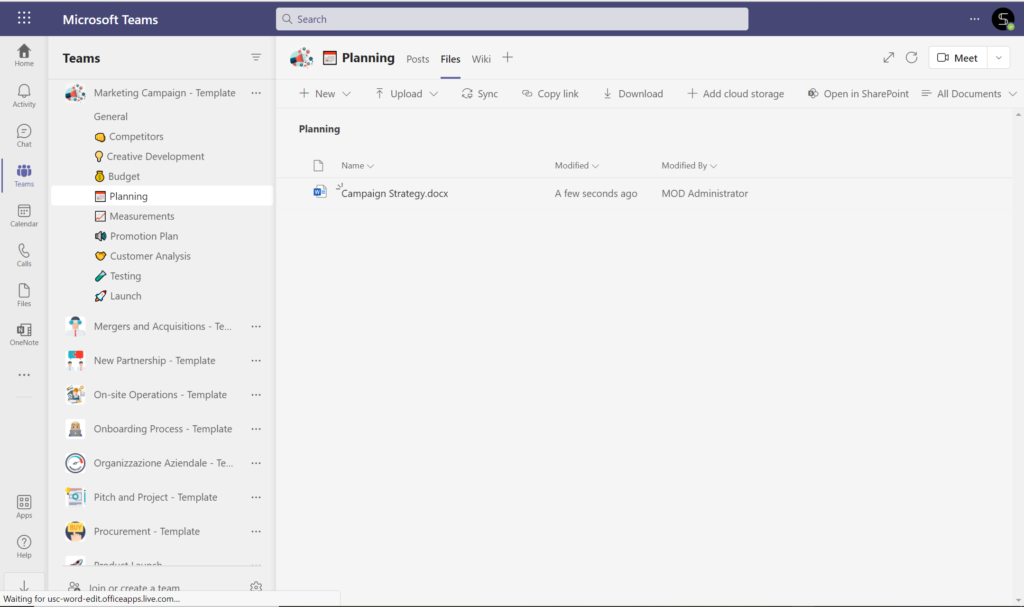
Notice how you can not only upload files and folders from your computer, but also create new ones right in Teams.
And voila, our document appeared in Microsoft Teams!
Learn more about file management best practices.
Where documents are stored
Now, here’s why we recommend you follow these steps instead of just attaching a file to a conversation.
Files that you upload to Teams are not located there. It appears so due to Teams’ seamless integrations with the rest of Microsoft 365 products.
All the files are in fact stored either in SharePoint (if shared in channels) or OneDrive (if shared in chat). What appears as files located in Teams are basically just links.
Whenever you create a team in Microsoft Teams, you automatically create a SharePoint site that stores all team’s data. Along with it, you create a Planner, a notebook in OneNote, and other products that form a part of Microsoft 365 groups. You can learn more about it here.
Each channel within a team represents a separate folder in that SharePoint site. So, whenever you randomly upload documents directly in channel conversations, they end up in the channel folder.
While it might not seem like a big problem at first, it can become quite messy after a while. Imagine having hundreds or thousands of documents stored chaotically in one folder without any structure?
Instead, you can go to the right channel, create folders to categorize your documentation and upload your files accordingly.

Note that you can only do that in channels. Files tab in Microsoft Teams chat doesn’t allow you to create folders. So, all the documents you share in chat go directly to OneDrive. However, you can create folders there directly. You can find the content you shared in My files tab on top left, and the content other people shared with you in Shared tab.
The ways to share documents in Microsoft Teams
Now let’s go through the ways you can share documents in Microsoft Teams.
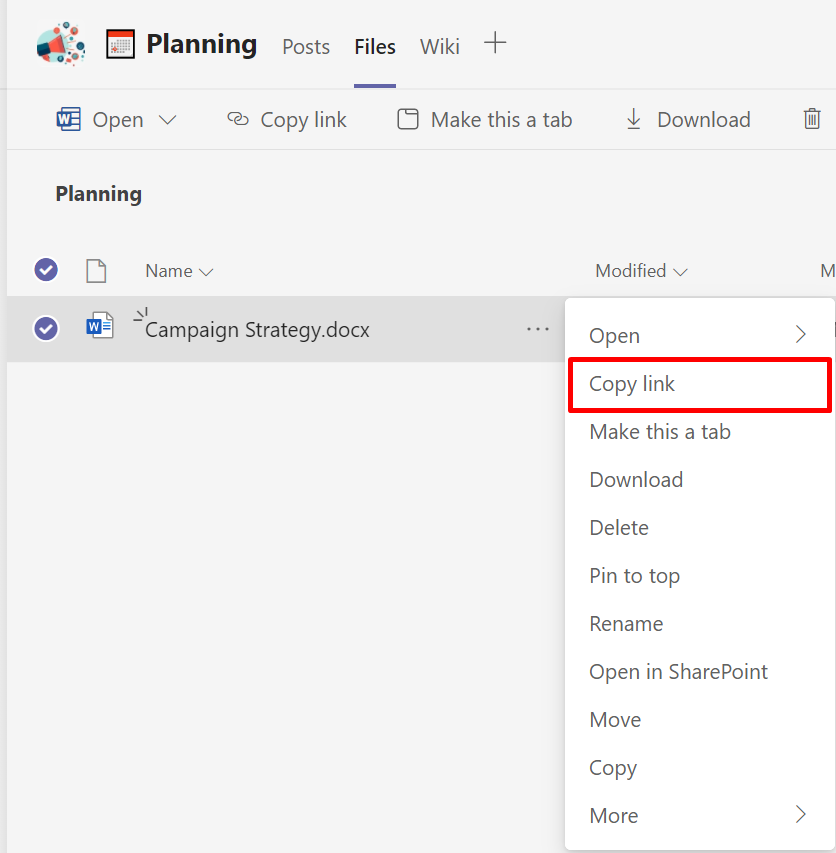
We’ve already agreed that it’s better to upload or create files in the Files tab first. So, in order to share them with your team you’ll need to copy their links. You can do that directly in the file,

In Teams,
Or in SharePoint.
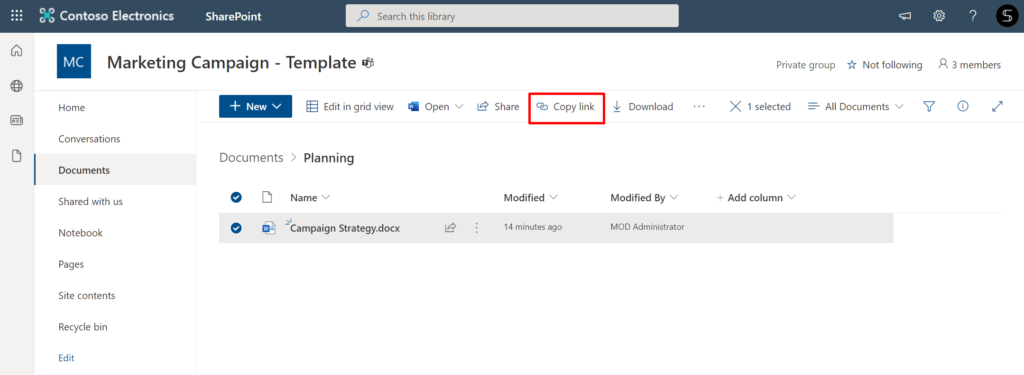
In a channel post or chat message
The process is pretty straightforward. You start a new conversation, click on the link icon on the top bar and paste your link. Or you can click on the link icon at the bottom and browse your team’s channels and attach the right file.
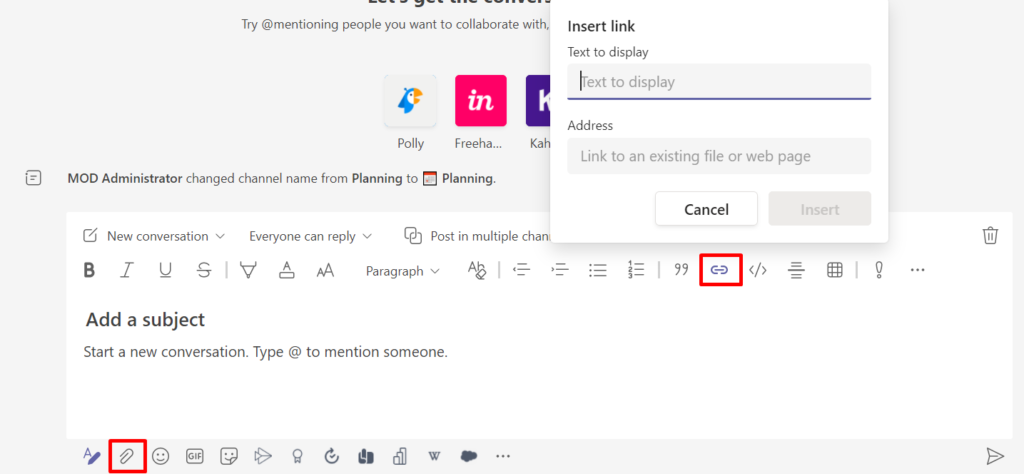
Exactly the same procedure applies to chat.
Pin as a tab
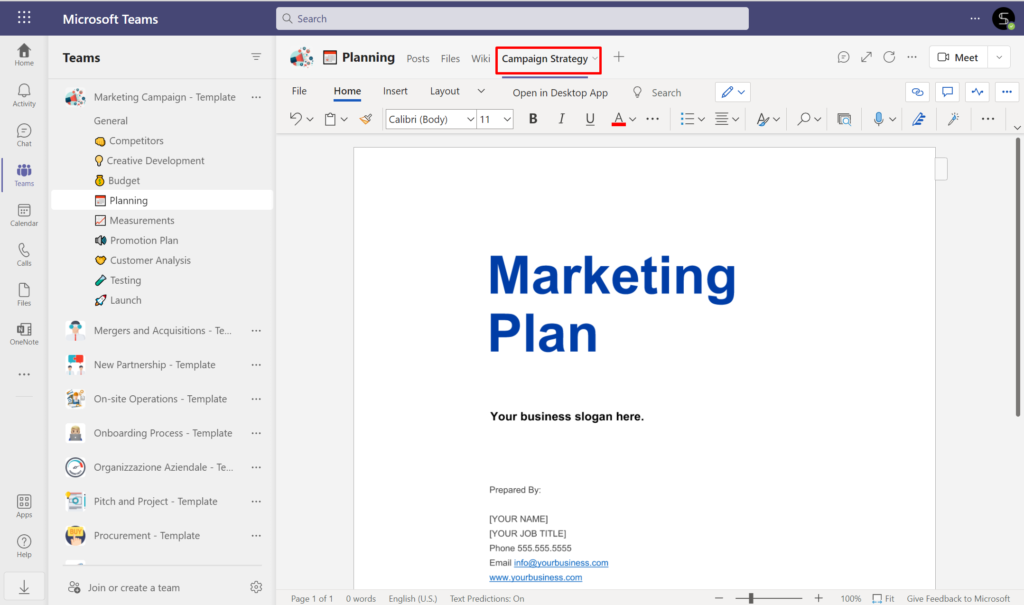
Another good way of sharing documents with your team is by pinning that as tabs in channels. By the way, you can do the same in private or group chats, if needed.
Of course, you do not want to pin all your documentation as tabs. However, if it’s a file that your team often refers to, that could be very helpful. You can collaborate on documents pinned as tabs together with the entire team in Microsoft Teams. Like this, you can pin guidelines, sales decks, instructions, best practices, etc.
Attach to tasks
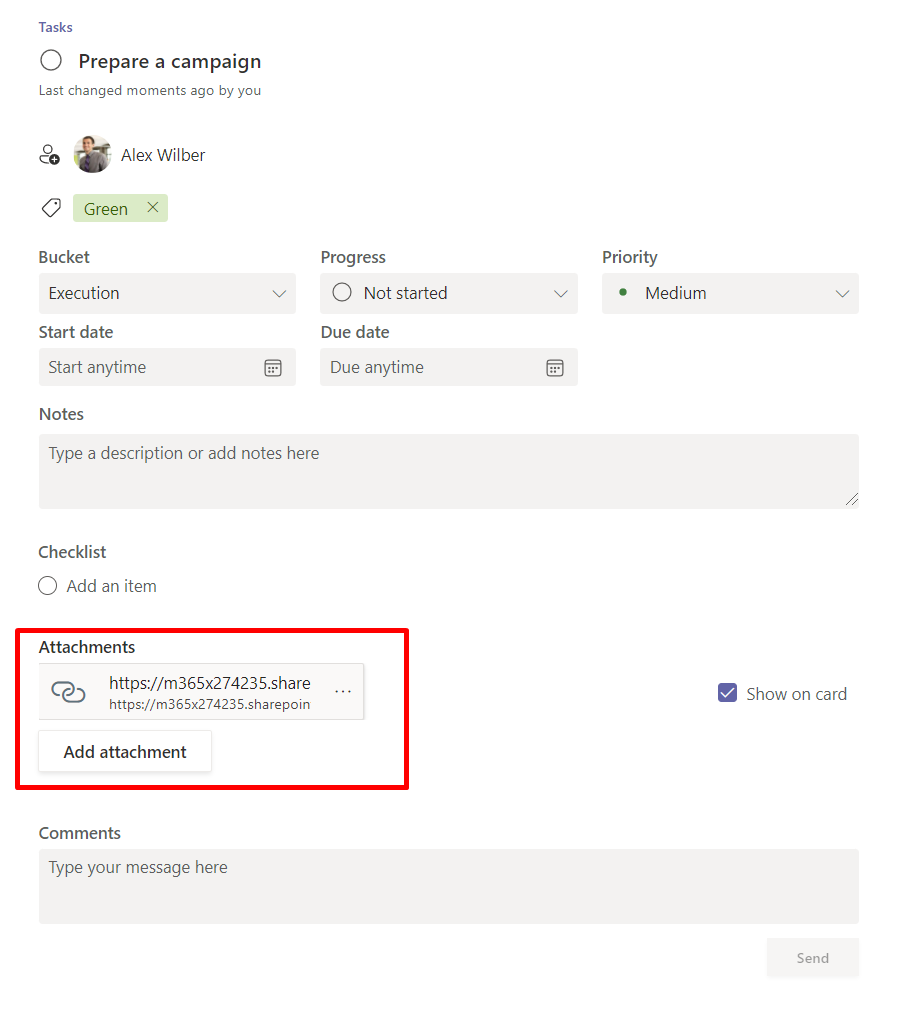
If you’re using Planner to manage tasks, you can share your documentation there too. That can actually increase your team efficiency: instead of searching for the right file in order to complete a task, they have all they need to start working on it immediately. For example, if you want your sales team to collaborate on a proposal, you can create a task in Planner and attach a link to the PowerPoint presentation.
Microsoft Teams & Planner: Best practices
Learn how to make the most of Teams <> Planner integration and build teams with pre-built Planner task boards
Request approval
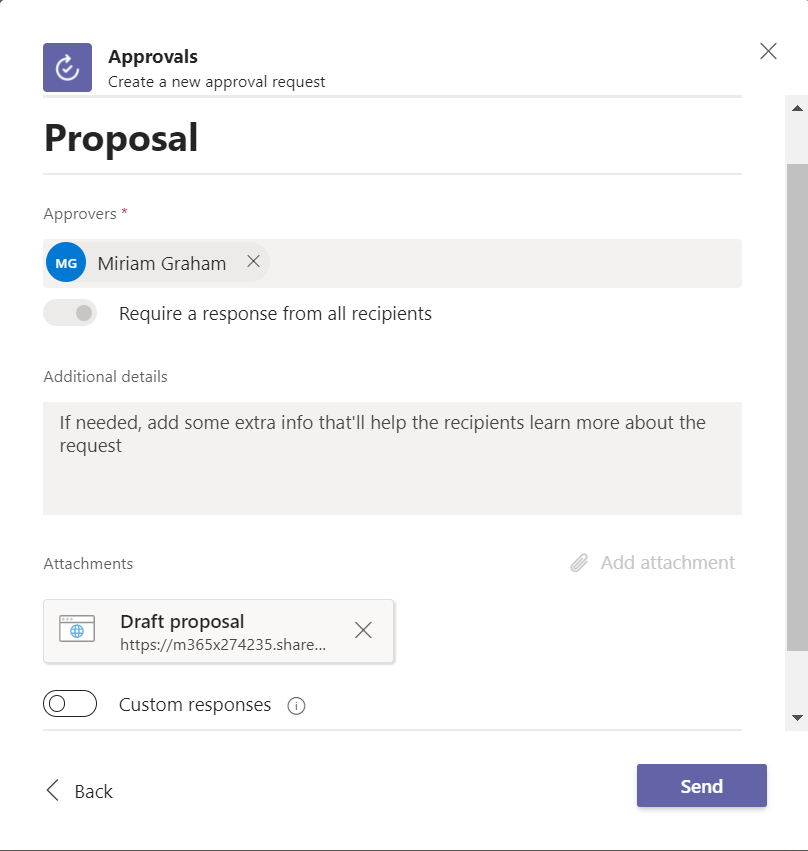
If you want your team manager to approve a certain document, instead of sending it to them in a chat, you can use the Approvals app. Just create the right type of approval and attach the required file to the card.
Collaborate on documents in Microsoft Teams
Opening a file
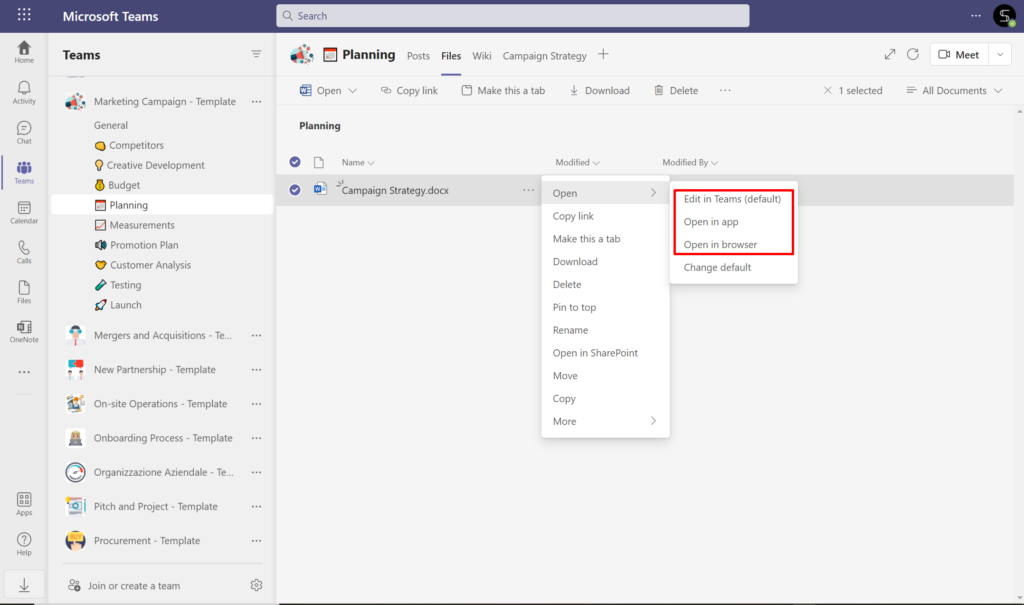
There are several ways you can open files shared in Teams:
- In Teams itself
- In a browser
- In a desktop app
Choose whichever format works better for you. Note however, that the Teams and browser versions don’t offer all the features the desktop app does.
Another thing is that you can’t open a document in Teams as a new tab. So, whenever you need to switch to a conversation, meeting, or another activity in Microsoft Teams, you’ll need to close the file.
Co-editing
Now, when the file is open, your co-editing begins. You can see what other members of the team have the document open or are already working on the file.
Track the changes each of your colleagues made by clicking on Review tab > Track Changes > For Everyone.

You can also compare different versions of the document, leave comments and @mention your team members, if needed. This way, they will receive a notification about your comment in their Outlook.
Checking out
You want to make sure no one else can make any additional changes to the document you’re editing, you can do the check out.
You can do so either in Microsoft Teams or SharePoint.
Find your document in the right folder, click on … > More > Check out.
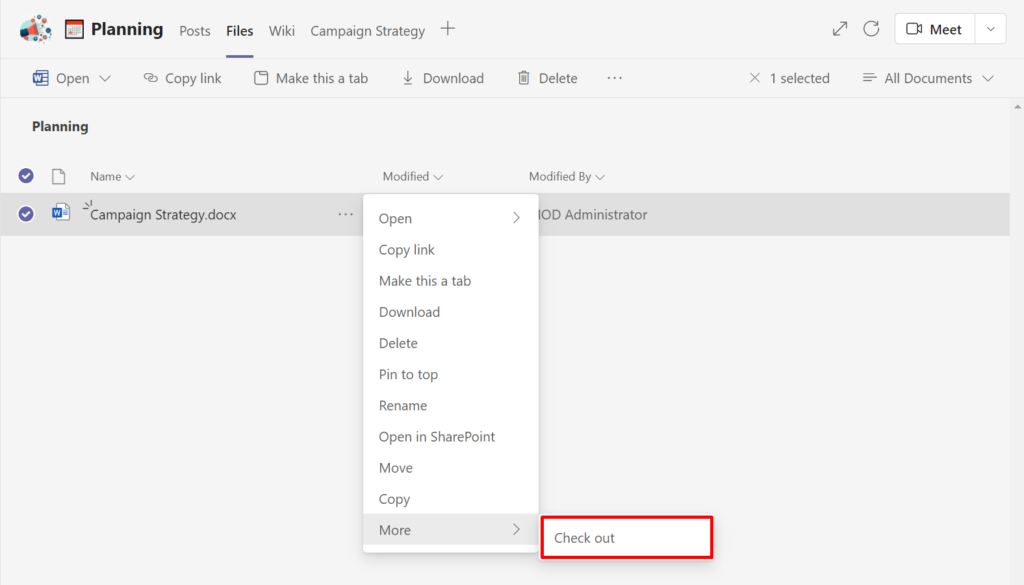
After you make all the changes you can check it back in by following the same steps. Or, if needed, discard all the changes.
Version history
If someone makes unnecessary changes to the document, you can always go back to its previous versions and restore the file.
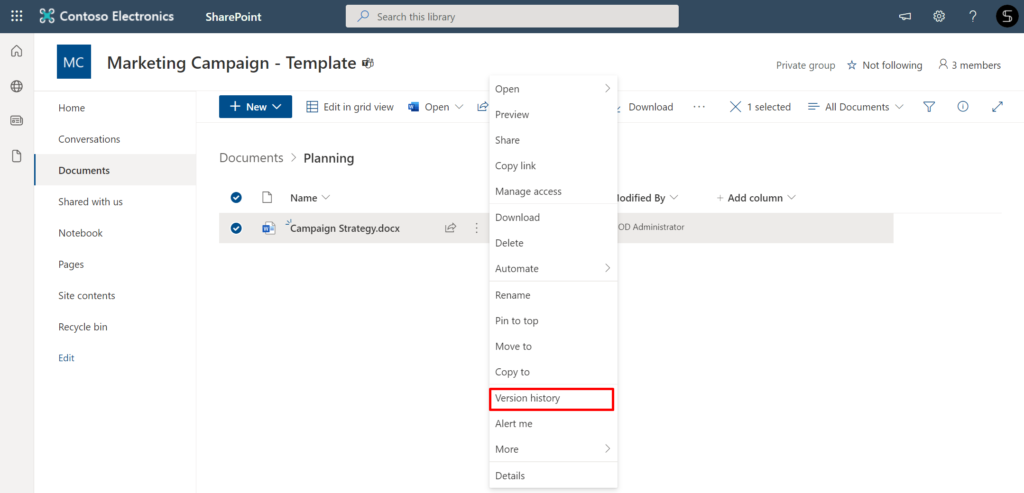
Open your file location in SharePoint, select the file and click on … > Version history. Then, pick the right version and click Restore.
Apply sensitivity labels
Every organization has a classification system for their internal documentation. It helps sort documents into groups such as public, internal, and confidential. Sensitivity labels are a digital translation of this classification. They help control who can access and share specific data in your organization.
You can apply sensitivity labels to documents you’re working on directly in the app. If your organization has all its sensitivity labels already set up, you can select the right one by clicking Home > Sensitivity.
If you’d like to learn more about sensitivity labels, head over to this blog post.

Have conversation around documents
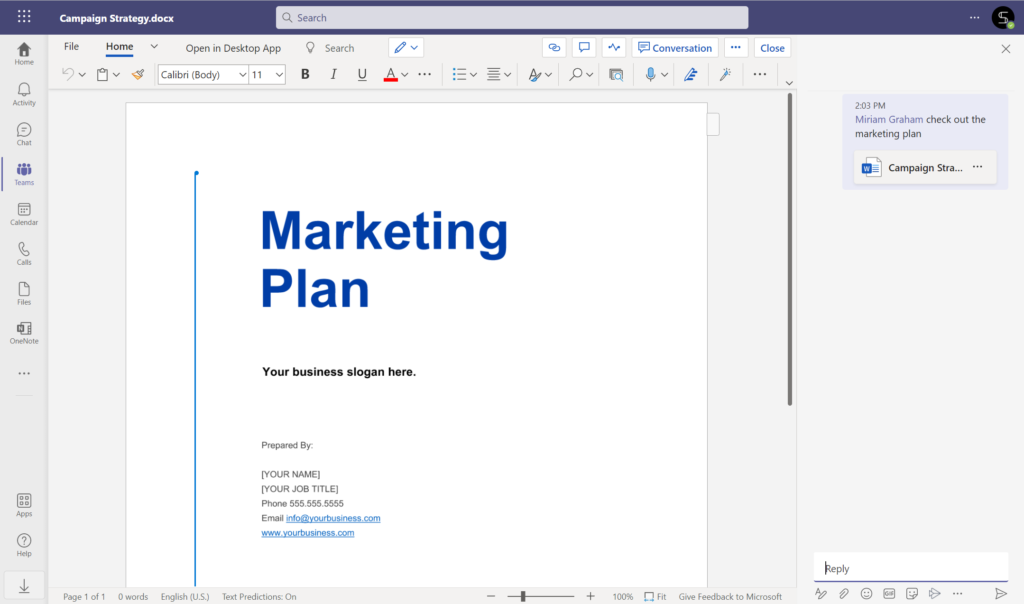
This is a feature that few people know about. You can collaborate on documents and have channel conversations around them without needing to switch between the file and Microsoft Teams.
Just open your document in Microsoft Teams and click on Home > Conversation. @mention the people you collaborate with and share updates with them.
Move files
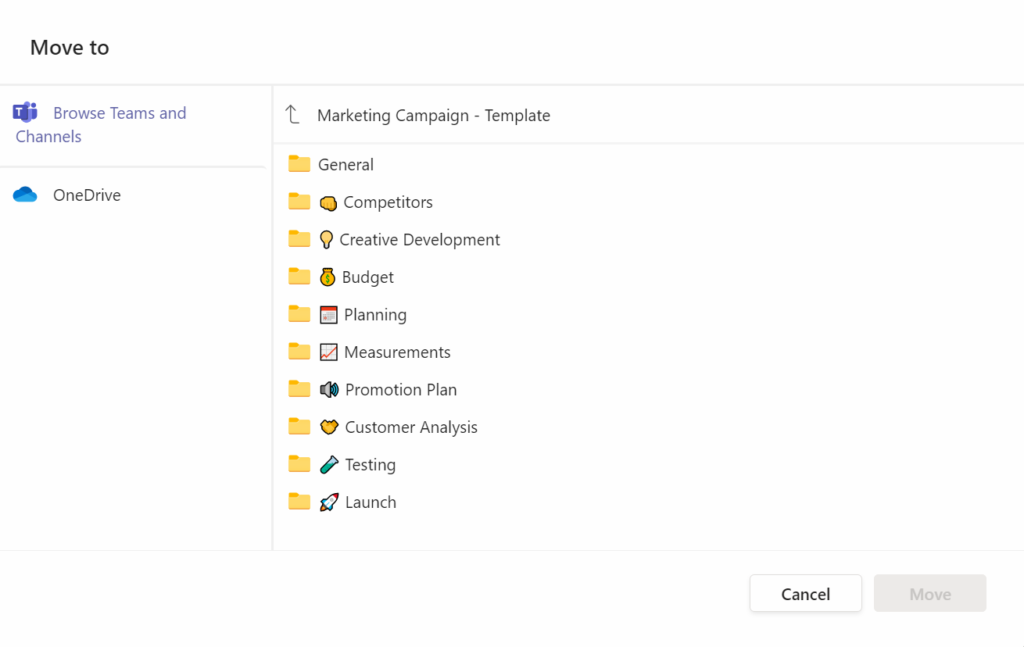
Sometimes we need to move files and folders to other folders, channels, and teams. Here’s how to do it:
Select the file or folder you want to move in Teams and, then click on … > Move
Then, browse your teams and channels.
Create teams with already added files and folders
What if you didn’t need to search for the necessary documentation across your organizational database and the web whenever you have a new project coming up?
You can have all the required files and folders already waiting for you when you create a new team to work on a deal, account, project, campaign, event or any other process.
It is possible with Collaboration Templates. You can pre-built templates for any scenario and upload all the content your team may require: playbooks and guidelines, legal documentation, file templates, reports, etc.
If you’d like to learn how to do that, check out this blog post or contact our team and we’ll walk you through the process.
Create Collaboration Templates with pre-built structure, tools, and content in Microsoft Teams
Download our step-by-step guide on how to create Collaboration Templates for Microsoft Teams
