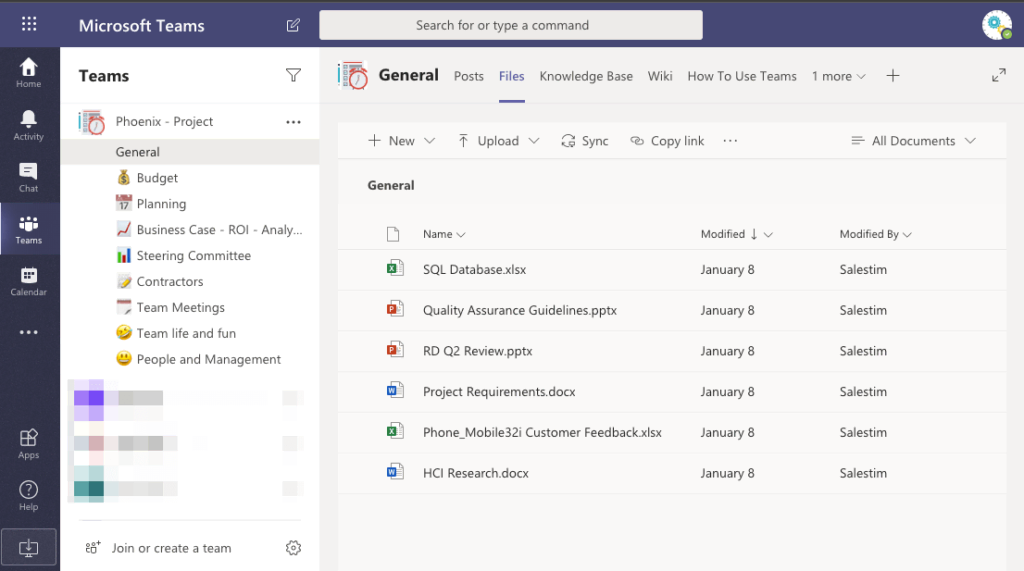
How many times have you found yourself in a situation when you and your team start working on yet another project, and you need to search for already existing documents in multiple locations? You’d like to compare this project with previous ones to have a reference and prepare a proposal. So, you waste your time gathering the information you need all over the organization. But wouldn’t be easier if you could create a fully provisioned team in Microsoft Teams that already contains all the necessary documentation? Well, there’s a way to do that through Microsoft Teams templates with copied files and folders. And today we will show you how.
Benefits of files and folders cloning
There are multiple benefits of having the required documentation automatically cloned into newly created teams.
Timesaving
This benefit appears quite obvious, but it is very true, especially if you work in a large company with multiple teams created every day. Searching for the right files can take quite some time, considering that you may need to ask other people for help.
Better organization
Meanwhile, if the same files are required for each team created around a certain topic – say, project management, – adding them manually becomes highly inefficient. Automating file and folder cloning with Microsoft Teams templates helps you better organize your working space and structure your document library
Clearer tasks
If you use Planner for task management in Teams, all the files that you attach to tasks in the original Planner template will also be copied in all newly created teams. This means that when your team members start working on the tasks for a new project, they could see what documents they can revise and consult. This feature allows you and your team to have a clearer understanding of the tasks and boost your productivity.
Create Collaboration Templates with pre-built structure, tools, and content in Microsoft Teams
Download our step-by-step guide on how to create Collaboration Templates for Microsoft Teams
How to build Microsoft Teams templates with files and folders
In order to build a Microsoft Teams Collaboration template with files and folders you will need to:
1. Create the original team
Let’s take a project management example and build an according team. We’ll call it Project Management – Template.
You may want to add all the channels that your future project management teams will require.
For example,
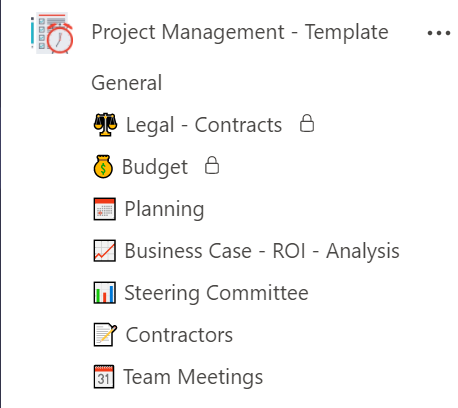
- Legal – Contracts
- Budget
- Planning
- Business Case – ROI – Analysis
- Steering Committee
- Contractors
- Team Meetings
You can build both standard and private channels. Here you can learn more about private channels.
2. Upload files and folders
This is the critical step if you wish to create new teams with already copied files and folders. At this point, you will need to upload all the files that your future Project Management teams will require.
Gathering all the files can take quite a bit of time, but in the end, you will only need to do it once at the template level. Then you have one problem less to worry about.
Every channel within your team has three default tabs: Posts, Files and Wiki. You should add your files and folders in the Files tab.
Make sure you structure all your documentation by uploading it only in the relevant channels. For example, you don’t want to add a list of contractors in the Team Meetings channel: that can confuse your team members and make it hard to find the necessary information.

3. Add tabs
To add visibility and easy access to certain files you can pin them as tabs in the relevant channel.
Just click on + ‘Add a new tab’ in the tabs bar, choose the application (say, Microsoft Word) and then choose the right file from your document library.
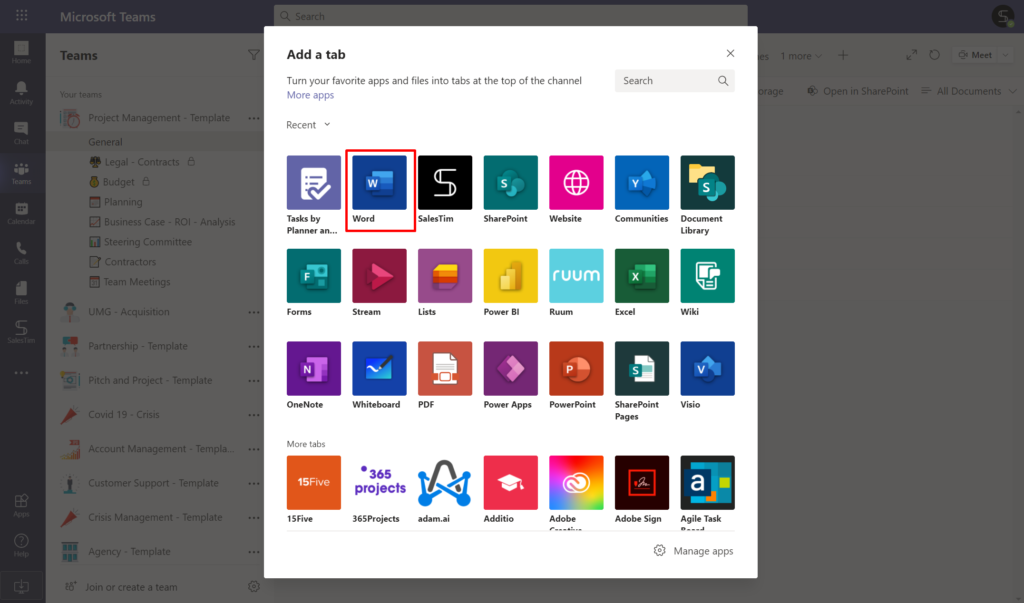
And it goes without saying that you can add other applications, including third-party apps, as tabs in your channels. For example, you can add Planner for task management, Calendar, Power BI, Survey Monkey, etc.
And that’s pretty much it! Your original team is ready. Now let’s create your template.
4. Create a new template
Open nBold app, go to Catalog and click on +New template.
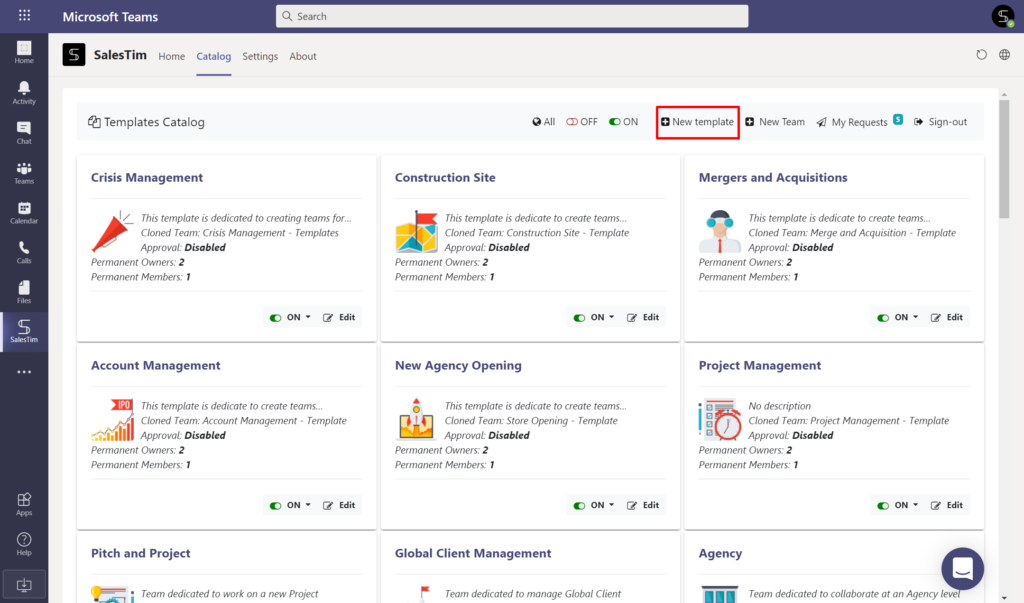
Then you’ll be asked to type the name of the team that you wish to choose for creating your template. In this case, we’ll type Project Management – Template.
Once you select it, you will see this window.
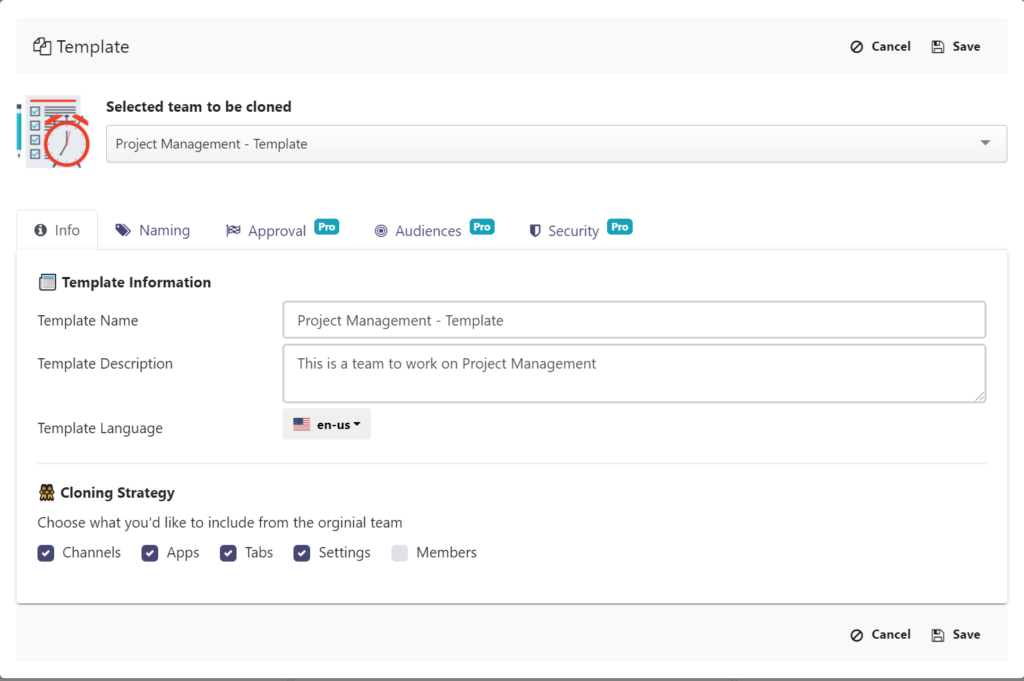
Here’s where you configure settings for your template. You can set up a Naming Convention, Approval workflow, Audience targeting and Security policies such as Permanent Owners and Members.
Learn more about Teams Governance.
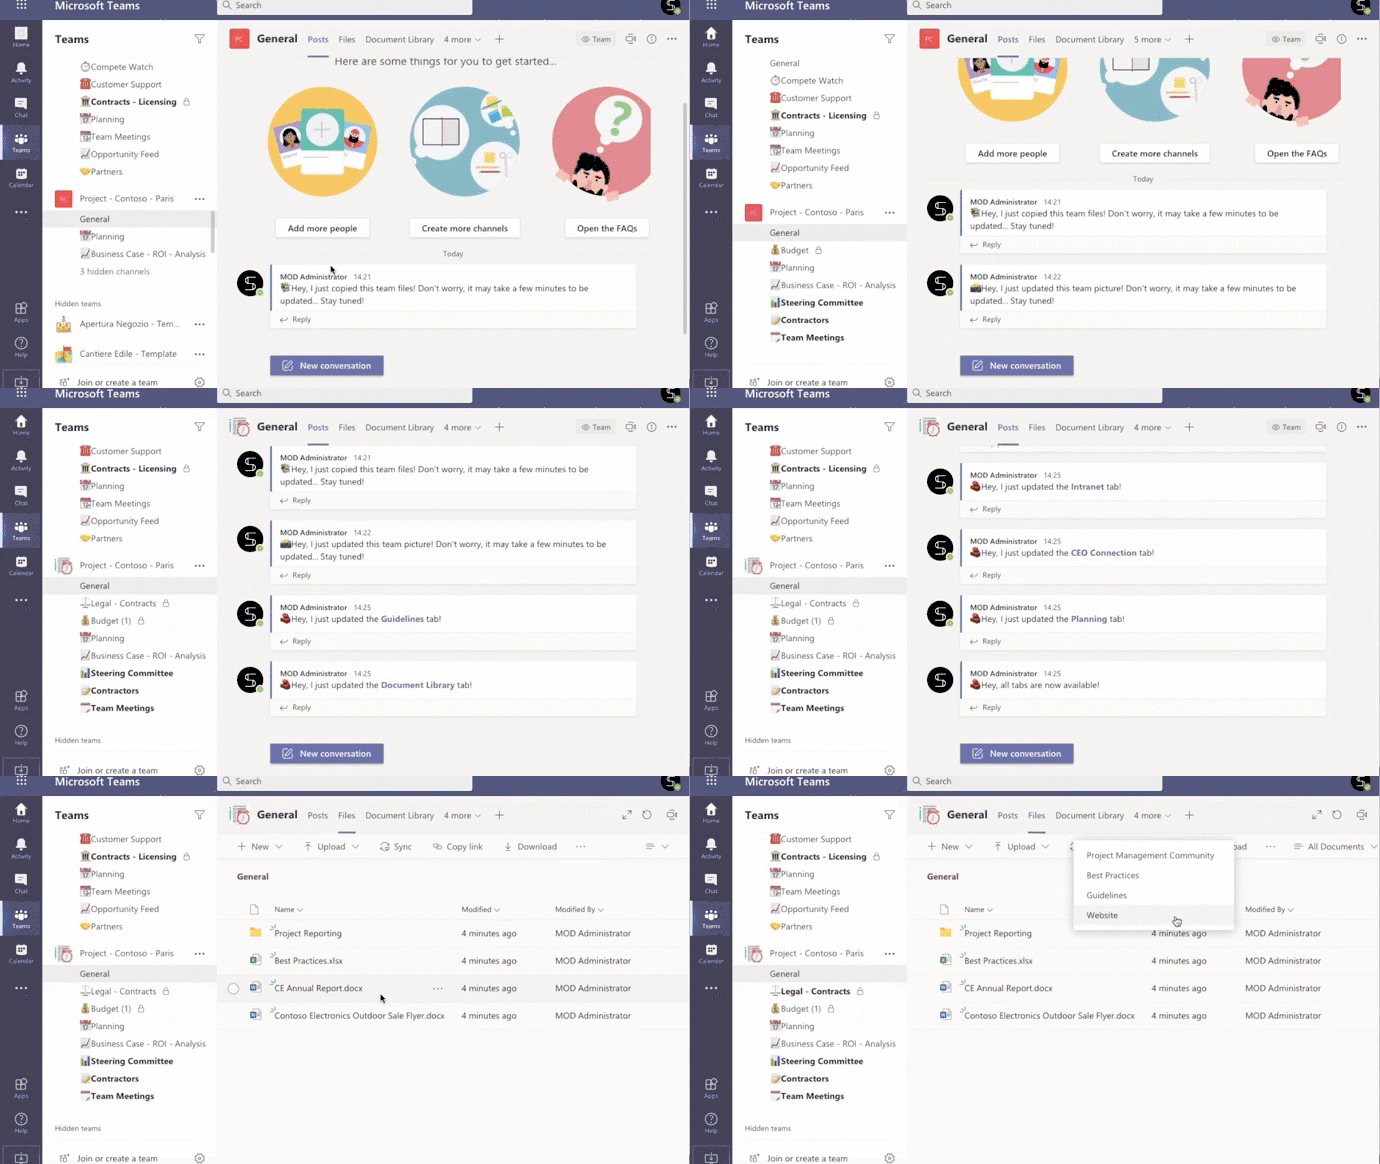
That’s it, you have created your new template! All the channels, files, folders, tabs and configurations that you set up for this template will be automatically cloned into new teams created from this template.

How to create a new team with copied files and folders from Microsoft Teams templates?
Now let’s have a look at the end-user experience of using our Project Management template for creating new teams.
1. Create a new team
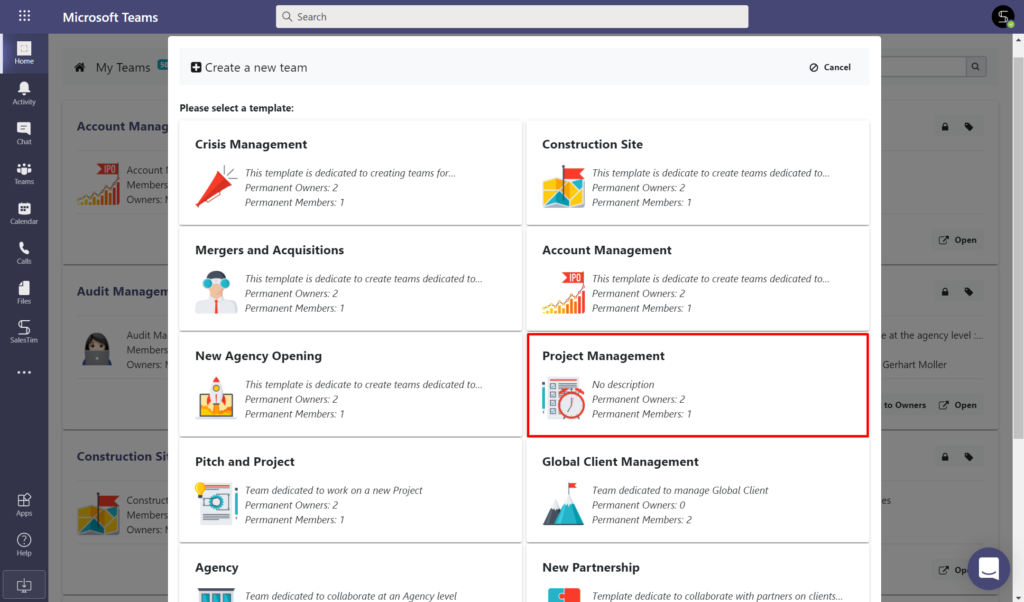
Firstly, you will need to click on the Home button in Microsoft Teams toolbar and select +New Team.

2. Choose a template
Then, choose the template that you’d like to use for creating a new team. In this case, we’re selecting our Project Management template.
3. Configure your team
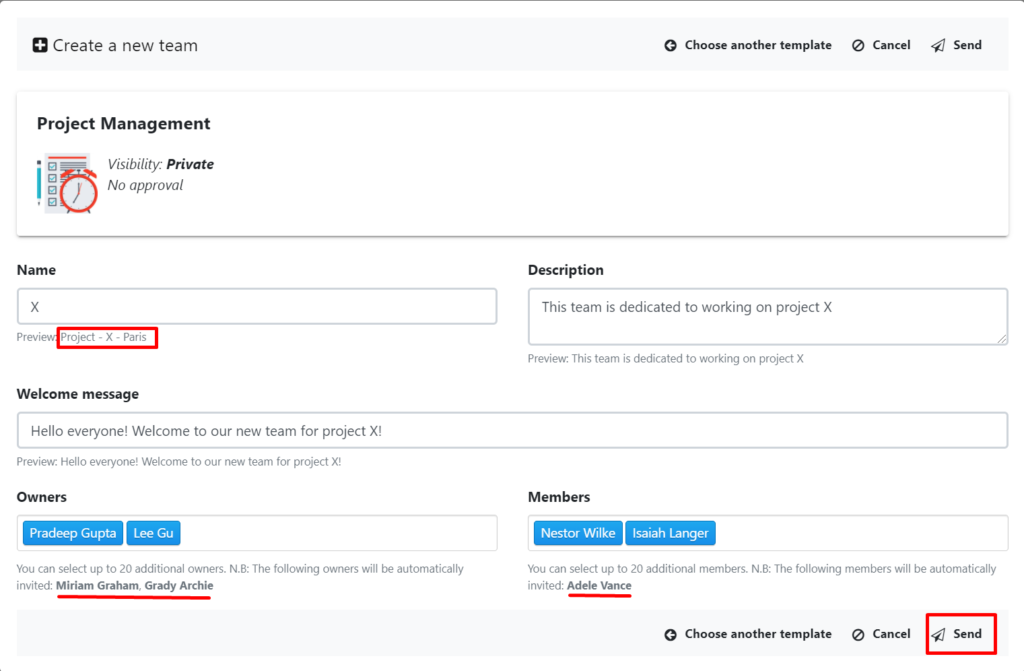
Now you will need to add a name, description, and welcome message to your team. Notice, that if you added a naming convention at the template level, your team will be name accordingly.
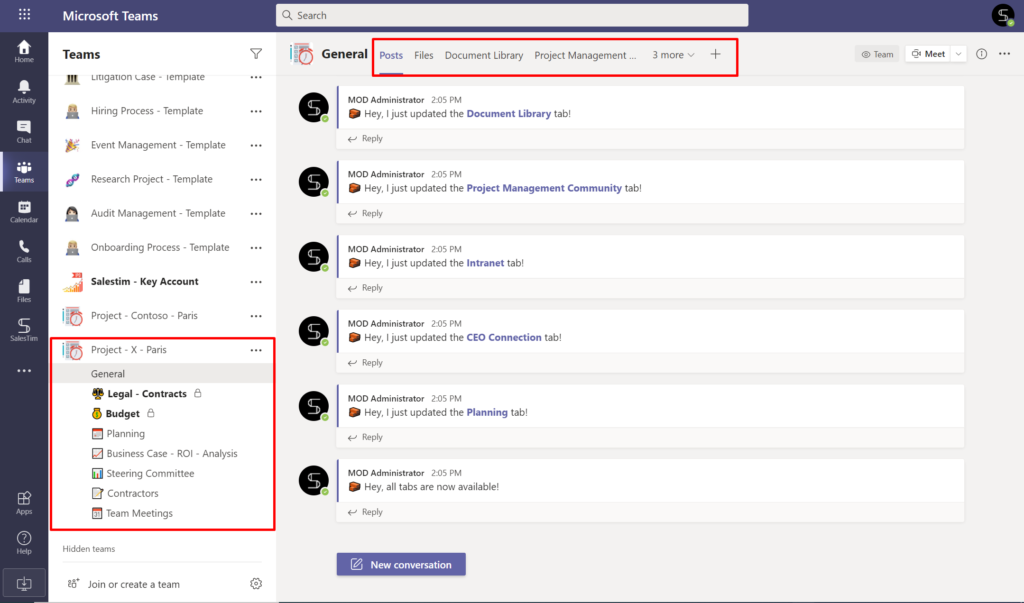
In this case, we named our team X and, in the preview, we can see that the finalized name will be Project – X – Paris, according to naming convention configurations.
And then your end-users can choose owners and members of the team. Notice again that some owners and members are added automatically at the template level.
Then, click Send.
That’s it! Now your team members can enjoy a fully provisioned team in Microsoft Teams with copied files, folders and tabs.
Interested in Microsoft Teams Collaboration templates? Book a demo with us tailored for your specific business needs.
