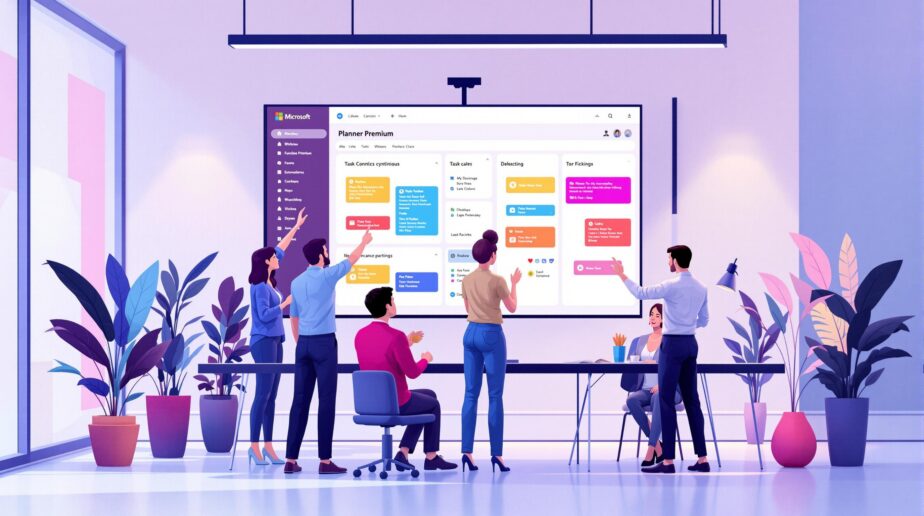
Microsoft Planner Premium is packed with tools to help teams manage projects more efficiently. Here’s a quick summary of how it can simplify your workflows and improve collaboration:
- Task Management: Use task dependencies, milestones, and custom fields for better organization.
- Team Collaboration: Integrate with Microsoft Teams, balance workloads with People View, and centralize communication with comments, attachments, and labels.
- Automation: Save time with Power Automate workflows and reusable task templates.
- Progress Tracking: Monitor project health using analytics, critical path tools, and AI-powered insights from Microsoft Copilot.
- Financial Oversight: Track budgets, allocate resources, and manage costs effectively.
Key Features Overview
| Feature | What It Does |
|---|---|
| Task Dependencies | Organize workflows with Finish-to-Start and more. |
| Microsoft Teams Integration | Centralize tasks and updates in one platform. |
| Power Automate | Automate repetitive processes. |
| Copilot AI | Generate reports and identify risks automatically. |
| Budget Tracking | Monitor costs and resource usage. |
Quick Tip: Start by creating clear project plans, setting up task dependencies, and integrating Planner with Teams for seamless communication. Then, use automation and analytics tools to save time and make data-driven decisions.
Keep reading for step-by-step guides on using these features effectively!
Core Features of Microsoft Planner Premium

Premium Features Overview
Microsoft Planner Premium brings advanced tools to streamline project management. Here’s a quick look at its key features:
| Feature Category | Advanced Capabilities |
|---|---|
| Analytics | Real-time performance tracking, predictive trend analysis |
| Financial Tools | Enhanced budget forecasting, resource management |
| AI Integration | Microsoft Copilot (Preview) for insights and suggestions |
| Team Collaboration | Workflow management across multiple organizations |
| Automation | Sophisticated workflow triggers and conditional actions |
These features help you manage projects more effectively as you set up your premium plan.
Creating Your First Premium Plan
Follow these steps to set up your plan based on your project needs:
-
Plan Creation and Structure
Click "+ New plan" to start. Choose whether to create a new Microsoft 365 Group or use an existing one. Break your project into buckets like "Planning", "Development", "Testing", and "Deployment" for better organization. -
Task Organization
Add tasks with clear deadlines and assignments. Include details like progress updates, descriptions, checklists, attachments, and custom labels to keep everything on track. -
Team Role Assignment
Assign roles to ensure proper access and accountability within your team.
Microsoft Teams Integration Guide
Integrating Planner Premium with Microsoft Teams helps centralize project management and communication. Here’s how to set it up:
- Add Planner as a tab in relevant Teams channels.
- Pin the Planner app for quick access.
- Adjust Teams notification settings to stay updated.
- Create dedicated channels for different project components.
Task updates will appear in the Teams Activity Feed, ensuring everyone stays informed. Use channel-specific Planner tabs to align with your project structure.
Using Planner Premium Tools Effectively
Task Dependencies and Milestone Setup
In Microsoft Planner Premium, task dependencies help you manage workflows and identify key project paths. The platform supports four main types of dependencies for organizing task relationships:
| Dependency Type | Description | Example Use Case |
|---|---|---|
| Finish-to-Start (FS) | A task begins only after its predecessor ends | Software development sprints |
| Start-to-Start (SS) | Tasks start at the same time | Parallel testing phases |
| Finish-to-Finish (FF) | Tasks finish together | Document review cycles |
| Start-to-Finish (SF) | A task ends when its predecessor starts | Resource handover scenarios |
To set dependencies, switch to Grid view and use the "Depends on" column. You can also use keyboard shortcuts like "3FS+10d" to create a Finish-to-Start dependency with a 10-day lag.
The critical path feature highlights tasks that directly affect your project timeline. Turn this on by enabling the "Show Critical Path" filter in Timeline view. Tasks on the critical path will be marked in red, making them easy to spot. Once dependencies are set, you can further refine task details using custom fields.
Custom Fields for Task Organization
Custom fields allow you to track project-specific metrics and improve task management. You can tailor these fields to your team’s needs, such as:
- Progress Indicators: Use percentage-based fields to track how close tasks are to completion.
- Risk Assessment: Add dropdown options like "High", "Medium", and "Low" to evaluate task risks.
- Budget Allocation: Create numeric fields to monitor costs associated with individual tasks.
By combining various custom fields, you can create detailed task views that support filtering and sorting based on your priorities. This makes task tracking more effective and ensures better scheduling in the Timeline view.
Timeline View for Project Scheduling
The Timeline view ties everything together, providing a clear visual schedule for your project. Here’s how you can make the most of it:
- Lead and Lag Time Management: Add lead time (e.g., "+Xd") to start tasks earlier, or lag time (e.g., "-Xd") to delay dependent tasks.
- Critical Path Monitoring: Use the critical path filter to focus on tasks that directly impact your project deadline.
With these tools, you can streamline your project planning and stay on top of deadlines.
Team Collaboration Methods
People View for Task Distribution
The People View gives a clear snapshot of how tasks are assigned across your team. It helps you spot team members who are either overloaded or not fully utilized. Here’s what it covers:
- Task allocation: See how many tasks each person has and how they’re distributed.
- Workload balance: Quickly assess how team capacity is being used.
Pair these insights with focused communication to keep your team running smoothly.
Task-Based Communication
Clear communication around tasks is essential. Planner Premium simplifies this by centralizing communication tools like notes, comments, attachments, checklists, and labels. Here’s how to make the most of these features:
| Communication Feature | Best Practice | Purpose |
|---|---|---|
| Task Comments | Use @mentions to notify specific team members | Makes sure the right people are informed immediately |
| Attachments | Store files directly in task cards via SharePoint | Keeps document versions organized and accessible |
| Checklists | Break down larger tasks into smaller steps | Helps track progress more clearly |
| Labels | Use color-coded categories | Makes tasks easier to identify at a glance |
Use task comments to highlight action items, note dependencies, share updates, or document decisions, making collaboration more efficient.
sbb-itb-8be0fd2
Workflow Automation Guide
Creating Task Templates
Simplify repetitive workflows by setting up templates with clear sections for each project phase.
To build effective templates:
- Add detailed task descriptions, checklists, and attachments to ensure clarity.
- Use consistent labels to organize tasks effectively.
When duplicating tasks, choose what to include:
- Descriptions
- Checklists
- Attachments
- Labels
- Due dates (adjusted based on the creation date)
Once your templates are ready, leverage automation tools to speed up task handling.
Power Automate Integration
Power Automate enhances Planner Premium by enabling automated workflows:
| Trigger Event | Action | Benefit |
|---|---|---|
| Form Submission | Create new task | Simplifies and speeds up task creation |
You can also link Power Automate with other Microsoft 365 apps to expand functionality.
Microsoft 365 App Connections

Boost Planner Premium’s potential by integrating it with other Microsoft 365 apps:
-
SharePoint Integration
Use SharePoint to store and manage files linked to your Planner tasks, ensuring version control and easy access. -
Teams Integration
Add Planner to Teams channels to get notified about task assignments and updates directly in the Activity Feed. -
Forms Integration
Automatically create tasks from form submissions, streamlining project request workflows.
How to Use the NEW Planner Premium for Projects
Progress Monitoring Tools
These tools provide real-time insights into how your project is performing, building on your task organization and dependencies.
Project Goals and Objectives
Setting clear goals is key to tracking progress effectively. Tie tasks to measurable business outcomes using metrics like:
- Task completion rates
- Timeline adherence
- Resource utilization
- Budget tracking
Use detailed health reports to keep an eye on these objectives and ensure everything stays on course.
Project Health Reports
Analytics can pinpoint bottlenecks and evaluate performance through detailed health reports.
| Report Type | Key Metrics | Use Case |
|---|---|---|
| Internal Status | Budget tracking, Resource allocation, Task progress | Weekly team reviews |
| External Status | Overall task metrics, Timeline progress | Stakeholder updates |
| Performance Analytics | Team velocity, Completion rates | Resource planning |
To create a status report:
- Open your project dashboard.
- Go to Copilot suggestions.
- Select "Status report."
- Pick either the Internal or External format.
- Review and customize the AI-generated summary.
Using Microsoft Copilot can make this process faster and more efficient.
Microsoft Copilot Integration

Microsoft Copilot is available for Project Plan 3 and 5 license holders. This tool simplifies project tracking by:
- Creating detailed project status updates
- Highlighting risks and potential delays
- Offering suggestions for improvement
- Keeping milestones on track
Pair Copilot with interactive charts and Power BI visualizations to enhance your monitoring efforts. Regularly review insights and adjust your approach as needed.
Conclusion
Summary of Tips
Microsoft Planner Premium provides tools designed to make team project management easier and more effective. Here’s a quick recap of the strategies we’ve covered to boost productivity:
- Task Management: Use task dependencies and milestones to map out clear project plans.
- Team Collaboration: Take advantage of the People View to evenly distribute workloads.
- Automation: Use Power Automate workflows to cut down on repetitive tasks.
- Progress Tracking: Rely on Copilot and health reports to make informed decisions based on real data.
These strategies aim to simplify project workflows while maintaining transparency and accountability.
Implementation Steps
Here’s a simple roadmap for putting these strategies into action:
-
Initial Setup
- Set up custom fields and integrate with Teams.
- Create task templates for recurring processes.
-
Team Onboarding
- Train your team on how to use task dependencies.
- Adjust notification settings for each team member.
- Set up personal dashboards for individual tasks.
-
Workflow Enhancement
- Link Power Automate for automated processes.
- Schedule regular project health reports.
- Use Copilot to assist with status updates.
Make sure to review and tweak these steps based on team feedback. Gradual adoption will help maintain steady productivity.
| Implementation Phase | Timeline | Focus Areas |
|---|---|---|
| Setup & Configuration | Week 1 | Custom fields, Teams integration |
| Team Training | Week 2 | Task dependencies, notifications |
| Workflow Optimization | Week 3-4 | Automation, reporting |
Success depends on regular monitoring and making adjustments to fit your team’s needs. Keep communication open and encourage feedback throughout the process.
